Naviate for Civil 3D contains a suite of advanced tools for creating and managing Property Data in our civil design models, and this post explains how we can use Naviate to assign classification codes to objects with the “Naviate Match Properties” command.
This command can be used to add additional property data to any Property Set by matching an existing Property Set value with an item in a look-up list.
In this example, we are going to assign Uniclass classifications to a road corridor that has been rendered as AutoCAD solids. The corridor solids were generated using the Naviate Solids from Shape and Solids from Link commands.

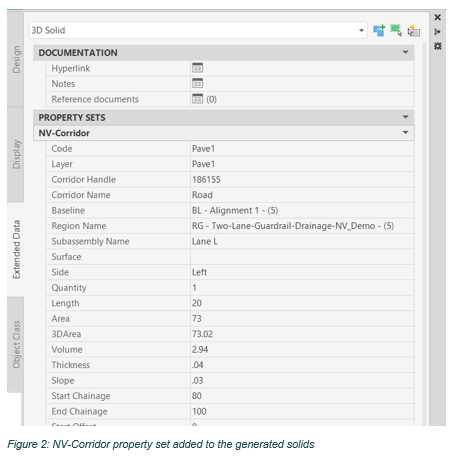
When using these commands to generate the corridor solids, we have assigned the default Naviate corridor Property Set NV-Corridor to the generated solids. This property set contains lots of useful information that has been gathered by Naviate from the corridor and it’s assemblies and is then added to the solids.
You can, of course, use the Autodesk Civil 3D commands to create your corridor solids, and use their Property Sets, and add the additional fields that you need.
We will define the classification codes we want to assign by creating a .csv “look-up” file. The file will contain the Uniclass classification code, a Uniclass description, and the Civil 3D shape or link code. Note the inclusion of the headers.

Create this file using Notepad or a similar plain text editor, and save the file with a .csv extension, placing it in the Naviate support folder for CSV files:
C:\users\public\documents\symetri\naviate\civil3d2022\uki\support\CSV
(For more information on the Uniclass 2015 codes, use the following link: https://www.thenbs.com/our-tools/uniclass-2015)
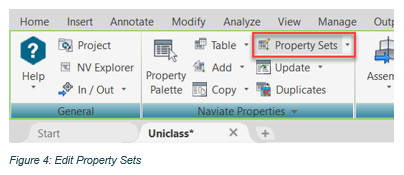
The next step is to edit the Property Set to include placeholders for our Classification and Description. Use the Naviate ribbon to edit the Property Sets.
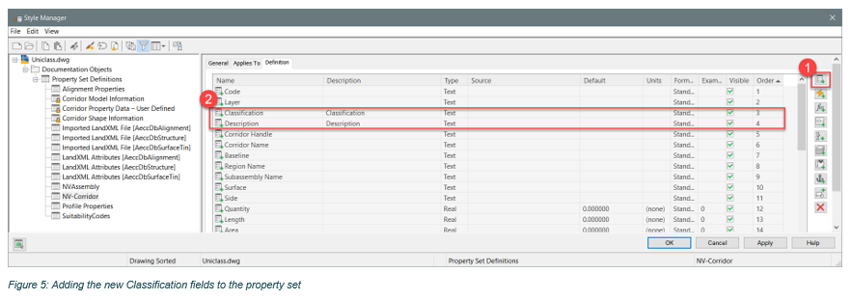
In the NV-Corridor Property Set, click “Add Manual Property Definition”, and set up fields for Classification and Description as below. The property names must match the column names in the Uniclass.csv file.
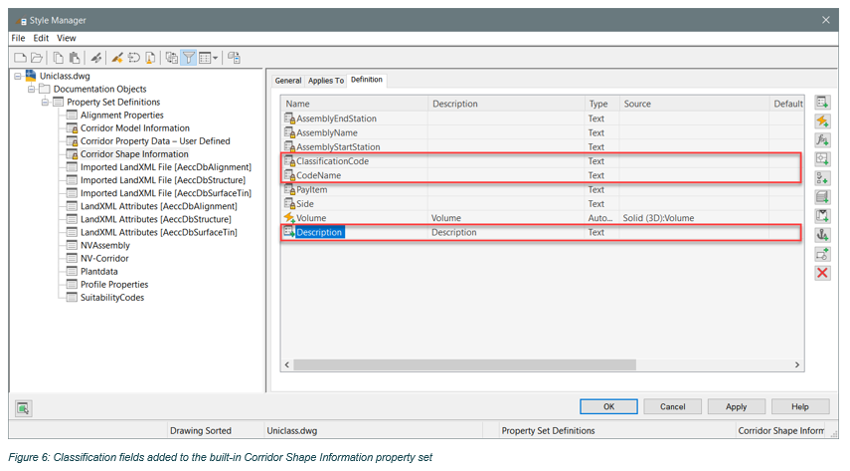
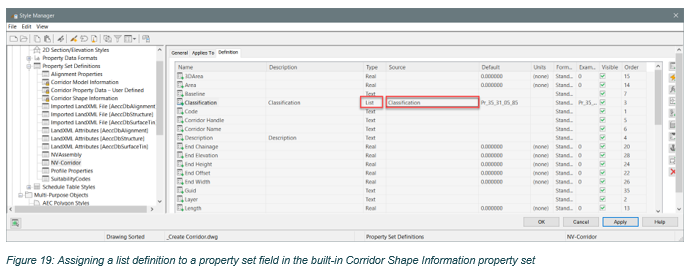
You can, of course, use the Autodesk Civil 3D commands to create your corridor solids, and use their Property Sets, as well as add the additional fields that you need. In the example below, we can use the built-in ClassificationCode and CodeName fields, and add a new Description field. The .csv file will need amending to rename the Classification field to ClassificationCode if you are using the included Civil 3D property sets.
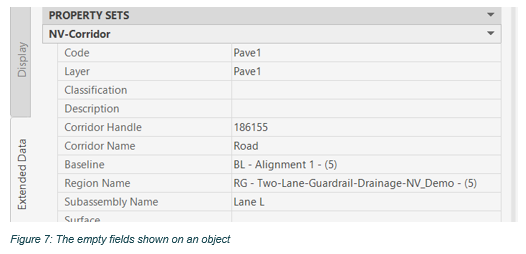
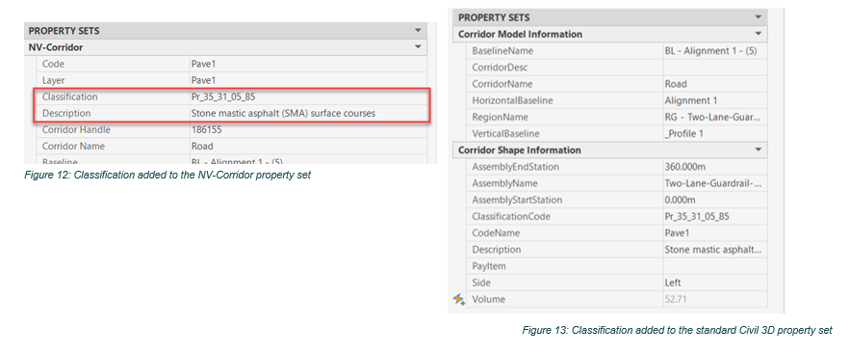
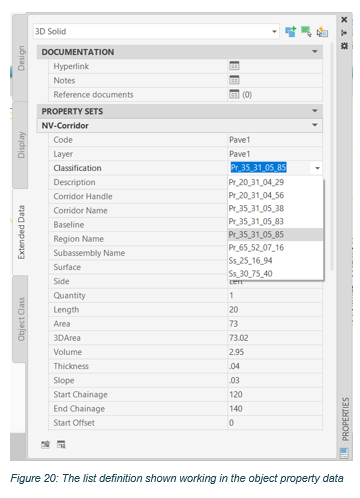
Selecting a solid from the drawing and viewing the property data, we can see that the new properties have been added:
Open the Naviate Property Palette and select the NV-Corridor Property Set.
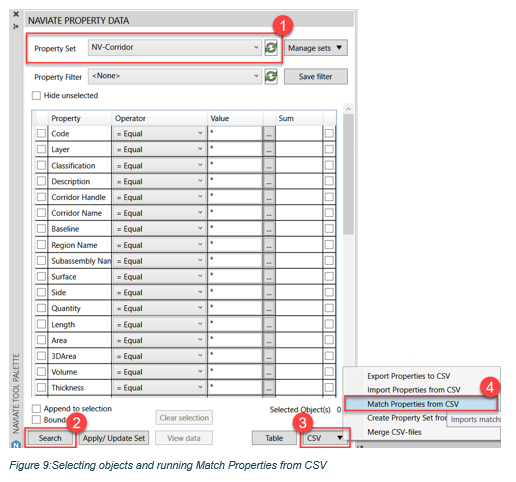
Click Search to select all the objects in the model that are assigned this property set. Then on the CSV button, select Match Properties from CSV.
In the dialog, browse using the […] button, choose the Uniclass.csv file, and make the other settings as shown below:
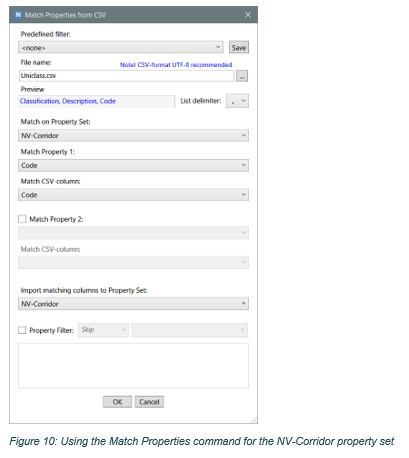
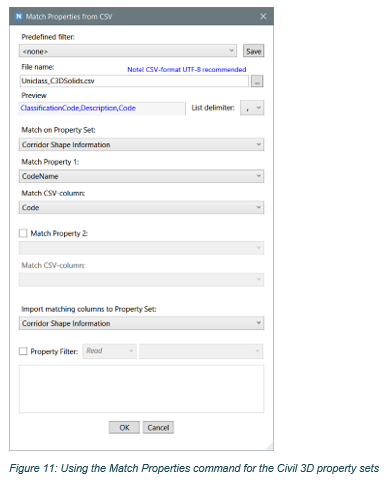
We are matching the Code property in the Property Set, with the Code field in the .CSV file, and then importing the data from all other fields in the .CSV file that match field names in the Property Set.
Click OK to complete the command, and then view the property data on one of the solids. You will now see the fields populated from the .csv file.
Import a .CSV file to use as a drop-down list
Another useful function of Naviate is the ability to import a .csv file to use as a list definition, which can then be assigned as a drop-down list or pick list for the Property Set.
Firstly, we need to make some changes to the .CSV file.

We have removed the Code fields, and replaced commas with semi-colons, to conform with international standards for .CSV. The file can be saved to C:\users\public\documents\symetri\naviate\civil3d2022\uki\support\NVPropertySets\Listdefinitions.
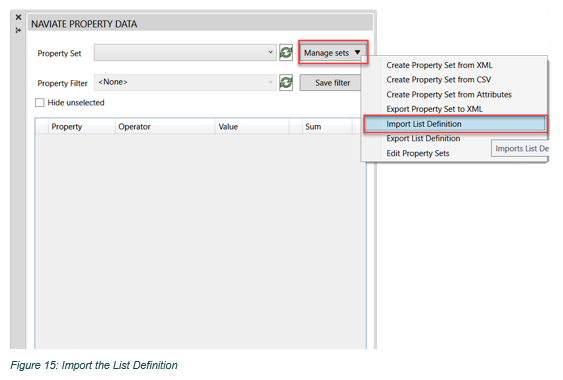
In the Naviate Property Data Palette, click on Manage Sets, then Import List Definition.
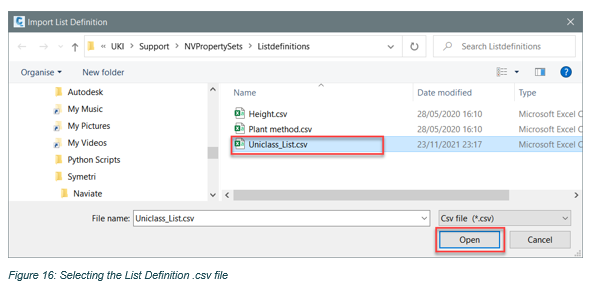
Select your new .CSV file, and then click Open.
Now open the Property Sets Style Manager again from the Naviate ribbon. Click on the Funnel icon to turn off the filters and expand the List Definitions. You can view the Classification list that was added.
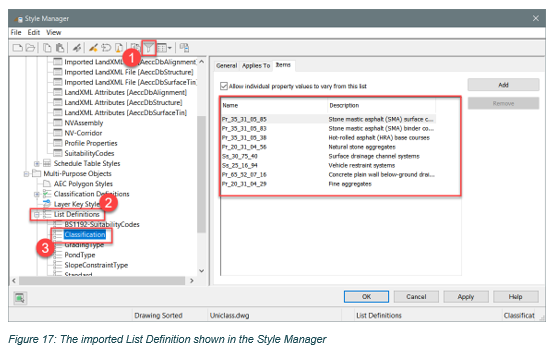
Note that the Description unfortunately is not visible anywhere else except in this window.
Now in the NV-Corridor property set, change the definition for the Classification property from Text to List, and select the Classification list.
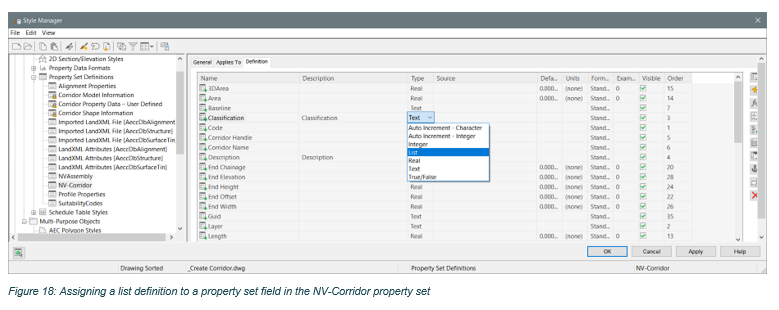
The Classification is now a drop-down list in the Property Set.
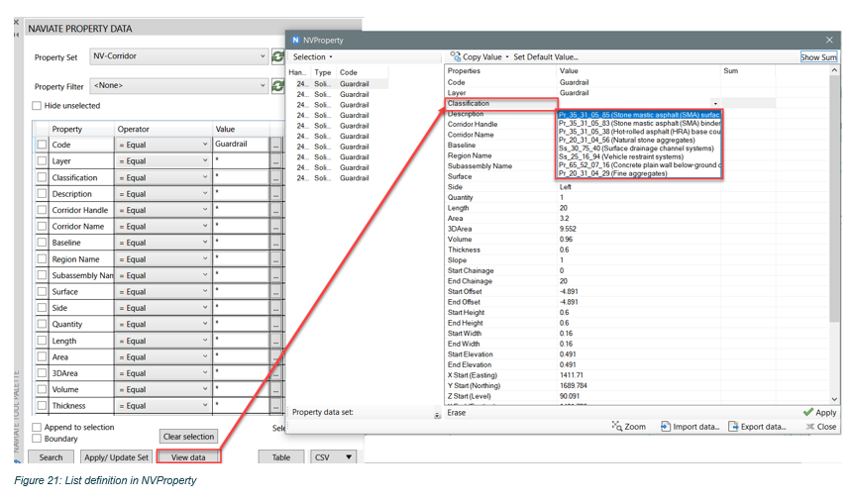
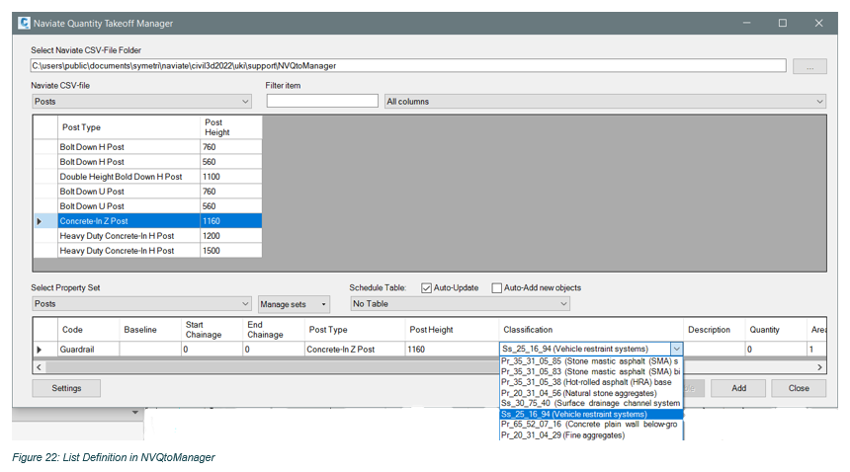
The list definitions are also available in other Naviate command dialogs, such as NVProperty and the Naviate QTO dialogs: -
If you would like to learn more about Naviate please visit our webpage here or contact us using the form below.
