
Securing the Modern Workplace
Learn how to protect your organisation from QR code phishing, adopt passkeys securely, and manage AI note-takers with the latest IT security advice from Symetri.
SketchUp Pro provides a wide range of materials out of the box for some of the most common uses. However, in some cases you need to create your own.

The process is straight forward, all you need is an image file containing the pattern that you would like to repeat in the material.
The following workflow provides step-by-step instructions on how to create your own materials from an image and how to create a custom collection for them in SketchUp Pro.
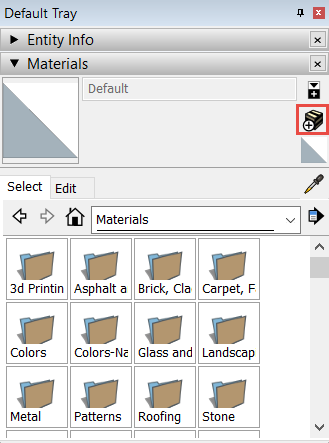
From the Materials section of the Default tray, click on the highlighted icon to create a new material as follows:
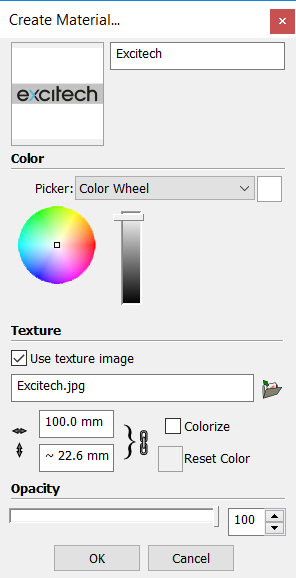
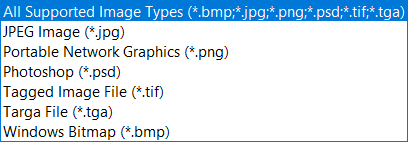
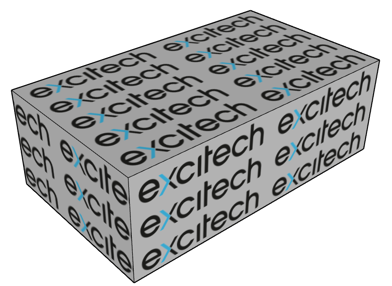
Select a name for your material, check the Use texture image option and browse to the image (supported file types below). Notice that you also have the option to select the size of the image in the material. If you then apply it to an area that is larger than these sizes, the image will be repeated to fit the entire space.
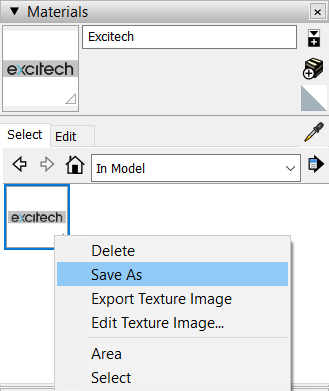
At this point, your newly created material will show in the Materials section of the Default tray, under the In model collection. If you save your model as a template (via File -> Save as template…), you can then use the custom material in any model that is created from that template.
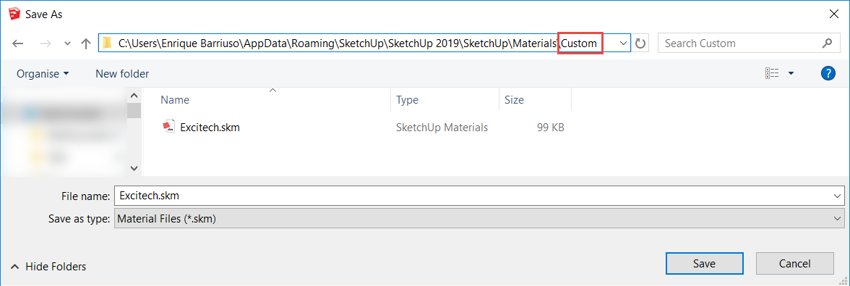
If you want to access your materials from any model, regardless of the template, you can create a custom collection. In order to do that, you need to save your material as a Material file (*.skm).
The Save As dialog will open in the following path C:\Users\<Username>\AppData\Roaming\SketchUp\SketchUp 2019\SketchUp\Materials. Create a folder in that location with a name of your choosing for the collection and save the material file in that folder.
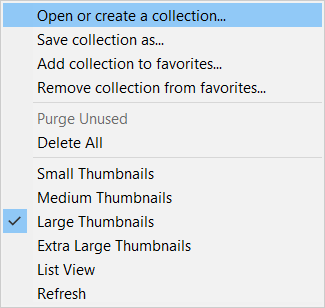
In order to add the collection, select Open or create a collection… from the Details button and pick the folder that you created for the collection in the previous step.

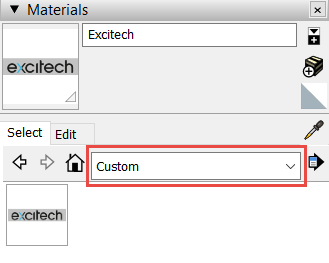
You can now access the collection from the drop-down menu, with all the materials that you saved in the folder.
If you would like to know more about SketchUp Pro and its capabilities, please call 0345 370 1444 or email info@symetri.co.uk.
*Note, the above blog was created by Excitech prior to becoming Symetri in January 2021, following its acquisition by Addnode Group. All Excitech products, services and solutions mentioned in this blog are available through Symetri.
Learn how to protect your organisation from QR code phishing, adopt passkeys securely, and manage AI note-takers with the latest IT security advice from Symetri.

Reduce downtime and improve service efficiency with AI-powered troubleshooting. Learn how service teams use ilean to solve problems faster and capture knowledge.

Cybersecurity risks are not always caused by sophisticated attacks or major system failures. In many cases, risk builds quietly through everyday habits, overlooked processes, and limited visibility into where data is stored or how users interact with systems.