
How AI Is Transforming Daily Work in Service Teams
Reduce downtime and improve service efficiency with AI-powered troubleshooting. Learn how service teams use ilean to solve problems faster and capture knowledge.

Since the introduction of the ribbon toolbar in version 2020, many users have been asking if the classic view is still available. Yes it is, however the classic view needs to be configured as the standard display by following the steps below.
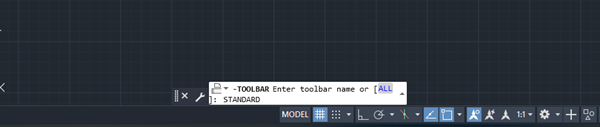
1. Once AutoCAD is open, type “-TOOLBAR” in the command bar.

2. Then type “STANDARD” and hit Enter on the keyboard, (if you have any custom toolbars created by your company or a 3rd party, you can load these in here at this time).
3. Type “Show” and hit Enter on the keyboard again. This will show the toolbar at the top of the screen. Should you want to display the tools on either side of the screen or the bottom, please also type in the relevant command here.

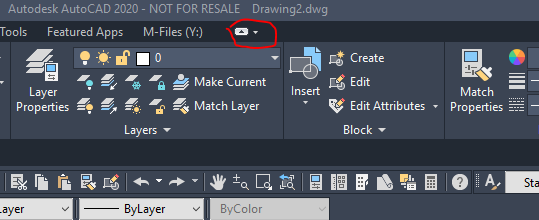
4. The classic view will appear at the top as a string of tools.

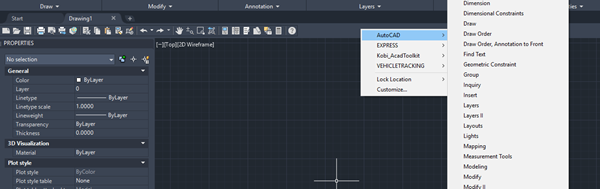
5. To apply the rest of the tools, right-click in the empty space next to the classic view tools and select “AutoCAD”. You can now select the options which you require to customise your AutoCAD.
6. To remove all the ribbons, type the command “RIBBONCLOSE” or select the icon in the menu section 3 times and the ribbons will disappear.
For further information please get in touch with us, or explore our range of AutoCAD training courses here.
Please submit your enquiry here and a member of our team will get in touch.
Alternatively call 0345 370 1444
Reduce downtime and improve service efficiency with AI-powered troubleshooting. Learn how service teams use ilean to solve problems faster and capture knowledge.

Cybersecurity risks are not always caused by sophisticated attacks or major system failures. In many cases, risk builds quietly through everyday habits, overlooked processes, and limited visibility into where data is stored or how users interact with systems.

Learn how to reduce cyber risk through stronger security foundations. This month's bulletin covers home office security, legacy technology risks, vulnerability management, MFA, and cybersecurity best practices.