
Securing the Modern Workplace
Learn how to protect your organisation from QR code phishing, adopt passkeys securely, and manage AI note-takers with the latest IT security advice from Symetri.
When I deliver a Revit Training course, I often like to include tips and tricks as I go along. I usually get asked numerous questions, but one thing that comes up regularly during the course is “How do I edit the profile of a curved wall?”.

When modelling walls that are straight, you can use the Edit Profile option on the model panel to sketch out the desired wall profile. However, the Edit Profile option will be greyed out if your wall is curved, which is why this question is so commonly asked.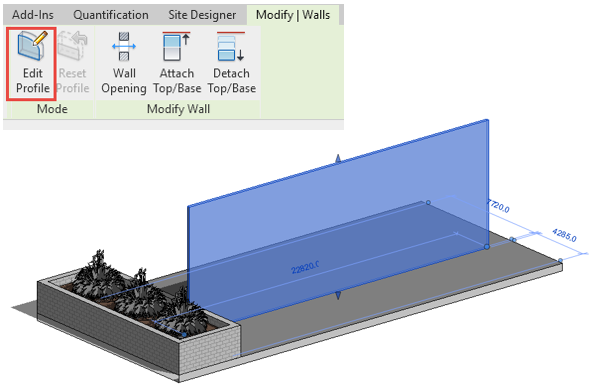
So, let’s get started. One of the methods you could use to edit the profile of the wall so that it slopes, is to create a Void Sweep. The first step is to use ‘Model In-Place’ to create the void that we will then use to cut away part of the wall. You will find this option on the Architecture tab in the build panel.
This will open the Family Category and Parameters dialog box. From the list of Family Categories, select ‘Generic Models’ and then click ‘OK’. You will be asked to give the mass a name. After doing so, click ‘OK’ again.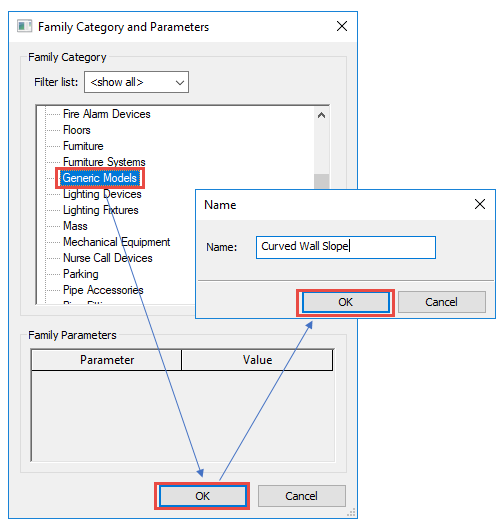
The option to create a void form will now show in the ribbon. After clicking on ‘Void Forms’, select ‘Void Sweep’ from the drop-down list.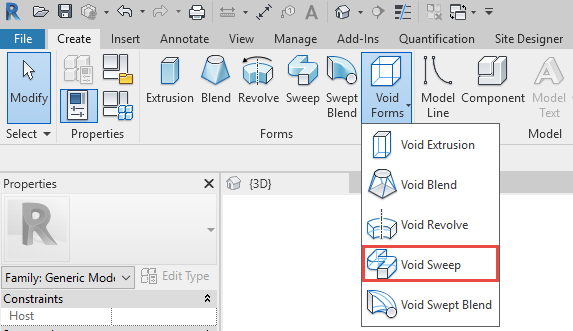
Start by creating the path for the Void Sweep - we will use the sketch path option on the sweep panel.
Draw a line through the path of the wall and click on the green tick to finish sketching the path.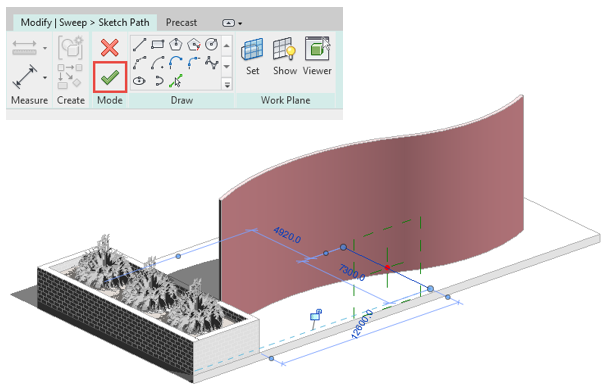
We now need to create the profile for our Void Sweep. Select the ‘Modify Sweep’ tab in your ribbon and click on ‘Edit Profile’ in the sweep panel. This will take you back to the sketch mode so you can draw in the shape for your profile.
Open an elevation view to sketch in the profile for the Void Sweep, then click the green tick on the ‘Mode’ panel to finish Editing and do the same to finish modifying the sweep.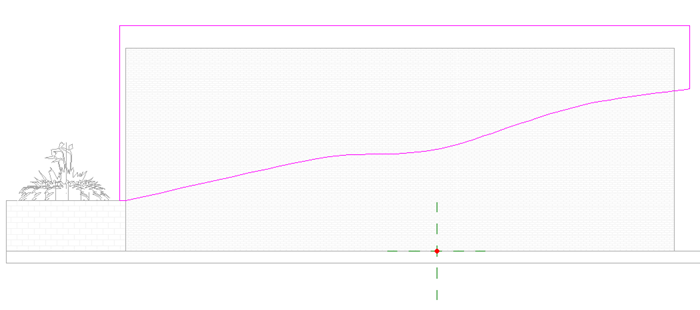
The last thing you will need to do is cut the wall using the Void sweep just created. Open the previous 3D view and select the Void Sweep, then click on ‘Cut’ in the Geometry panel.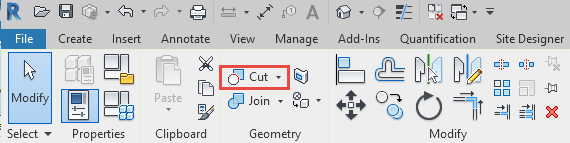
Make sure that you tick the ‘Multiple Cut’ check-box if you have multiple sections of the wall to be cut.
To create the slope first select the Void Sweep and then select each section of wall to cut.
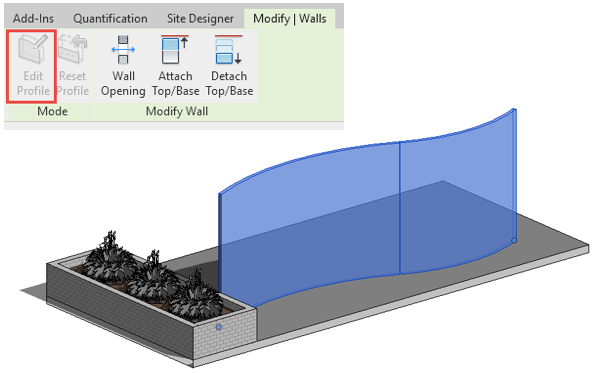
And there you have it!
For more tips and tricks, join me or my colleagues on one of our Revit training courses. Take a look at our full range of Revit training courses here.
Learn how to protect your organisation from QR code phishing, adopt passkeys securely, and manage AI note-takers with the latest IT security advice from Symetri.

Reduce downtime and improve service efficiency with AI-powered troubleshooting. Learn how service teams use ilean to solve problems faster and capture knowledge.

Cybersecurity risks are not always caused by sophisticated attacks or major system failures. In many cases, risk builds quietly through everyday habits, overlooked processes, and limited visibility into where data is stored or how users interact with systems.