
How AI Is Transforming Daily Work in Service Teams
Reduce downtime and improve service efficiency with AI-powered troubleshooting. Learn how service teams use ilean to solve problems faster and capture knowledge.
Style Rules can be used in Infraworks to control the style of multiple objects.
You can make the style dependent on the properties of the object or choose from a selection of styles at random with a certain probability. This blog post will show a couple of simple examples with possible uses of the style rules.
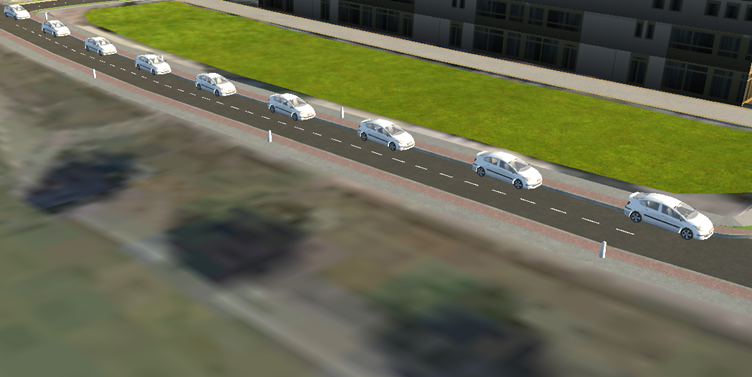
In the first case, we will randomise the appearance of the cars in our Infraworks model. A similar approach could be employed to modify the façade style of a group of buildings or to change the style of a stand of trees.
We start by creating a row of vehicles. Initially, all of them will be assigned the same style.
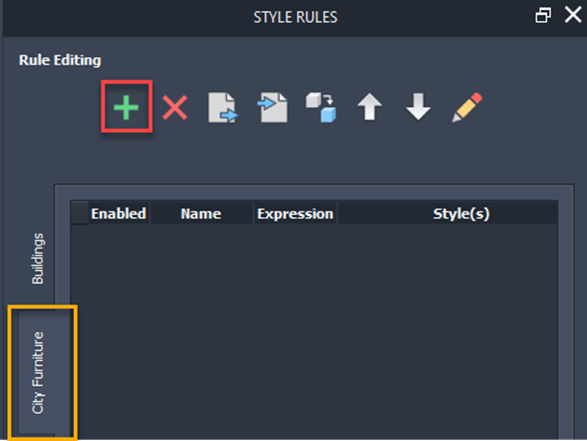
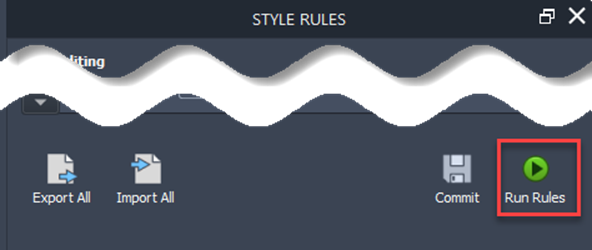
Open the ‘Style Rules’ palette from the extended ‘Display’ panel in the ‘Manage’ tab of the ribbon.

Navigate to the ‘City Furniture’ tab and click on the ‘+’ button to create a new style rule.
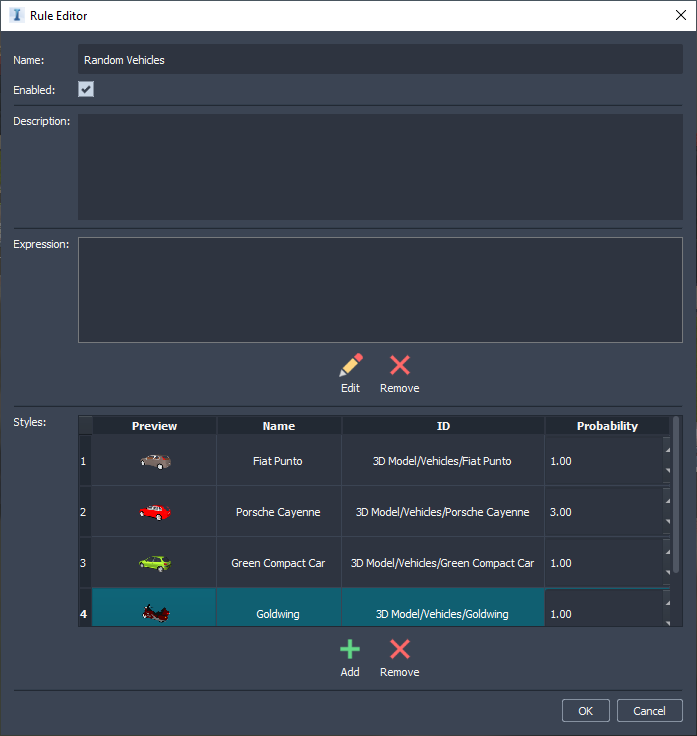
After typing a name for the rule, the ‘Rule Editor’ dialog displays. Add a few vehicles in the ‘Styles:’ section and assign a probability to each of them. With the values shown below, approximately half of the cars will be red and the other half will be evenly distributed among the other three models.
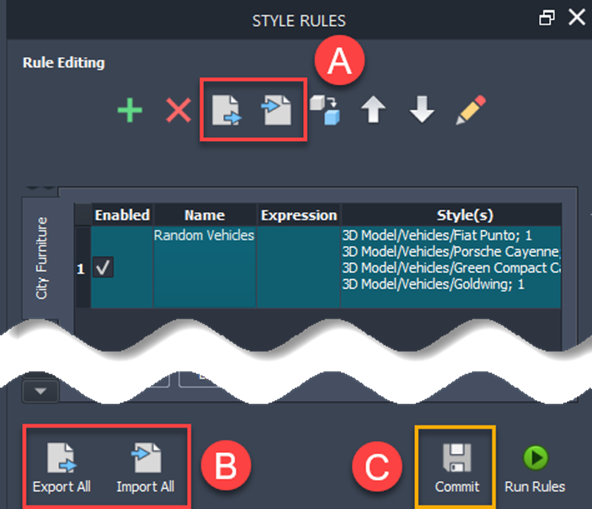
Optionally, you can export the rules to a JSON file that you can then import into other Infraworks models (see A below). There is also an option to export all the rules of all types (B). You will need to commit the changes into the database (C) first if you wish to use this option.
You can now apply the rules by clicking on the ‘Run rules’ button.
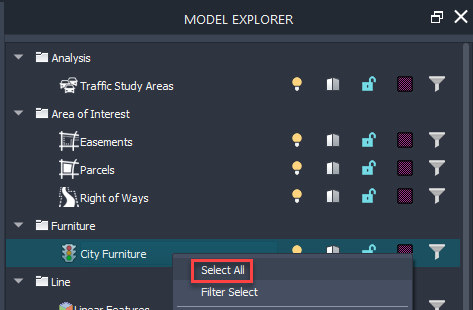
There is one more step for the rule styles to display. If a manual style has been applied to an object, it will override the rule style. We need to change the manual style for all the vehicles to ‘None’ in order for the rule style to be used.
If you do not have any other city furniture in the model, you can use the ‘Select all’ option from the right click menu in ‘Model Explorer’ to select all the vehicles. Otherwise, ‘Filter Select’ can help you select a group of objects that share common properties.

With all the vehicles selected, change the ‘Manual Style’ to ‘None’.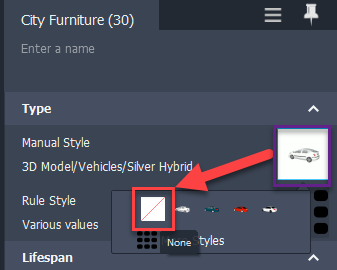
The rule styles should now display.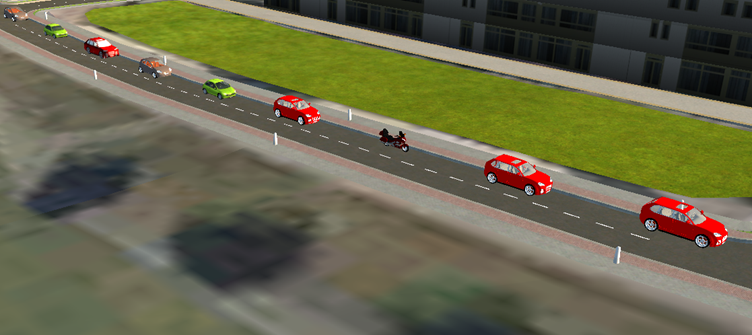
In our second example, we will apply a different colour to the buildings depending on their height. We could equally apply a more realistic style to the façade or set a style to the roads according to their type.
This time the style rule needs to be created in the ‘Buildings’ tab. Add the colour to be used in the ‘Styles:’ area and use the corresponding button to edit the expression that will determine the condition that needs to be met.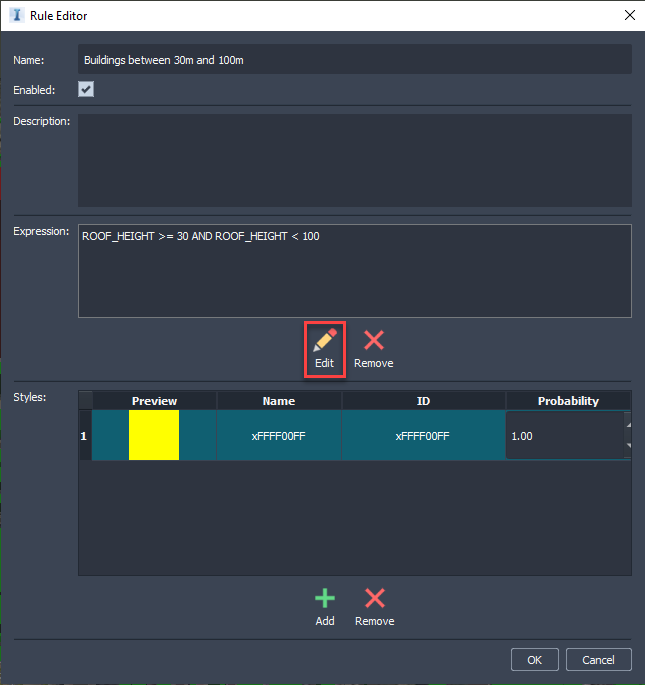
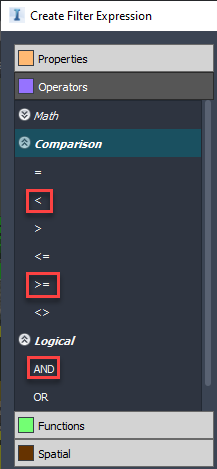
Build the expression by combining properties and operators from the left panel, as shown below. If you click on the button on the bottom right corner, a panel will be visible on the right hand side that will display the values that the selected property takes for all the objects in the model.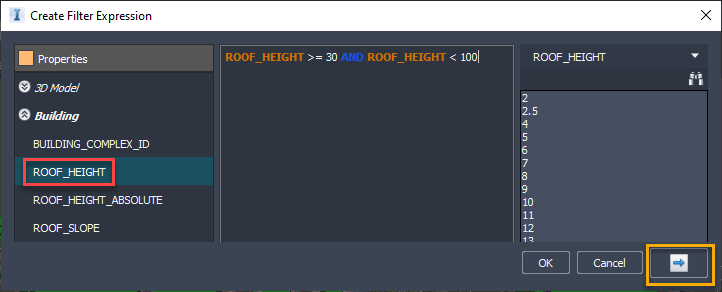
In this instance, we create three rules for buildings over 100 m to show in red, below 30m in green, and buildings between 30 m and 100 m in yellow.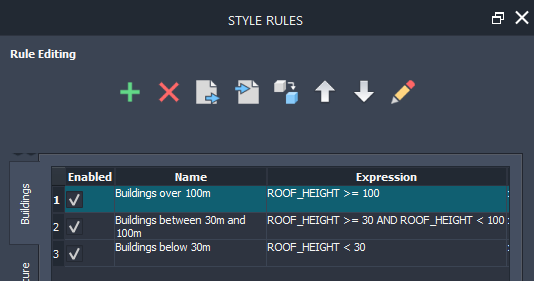
Run the rules, select all the buildings, and set the ‘Manual Style’, ‘Base Color’ and ‘Roof Material’ to ‘None’. You can do this in a separate proposal if you also want to keep the original styles.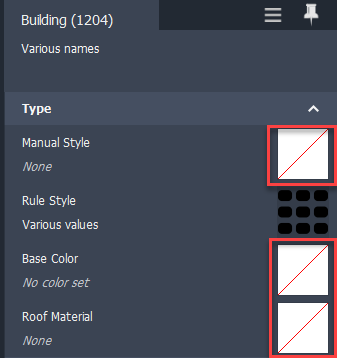
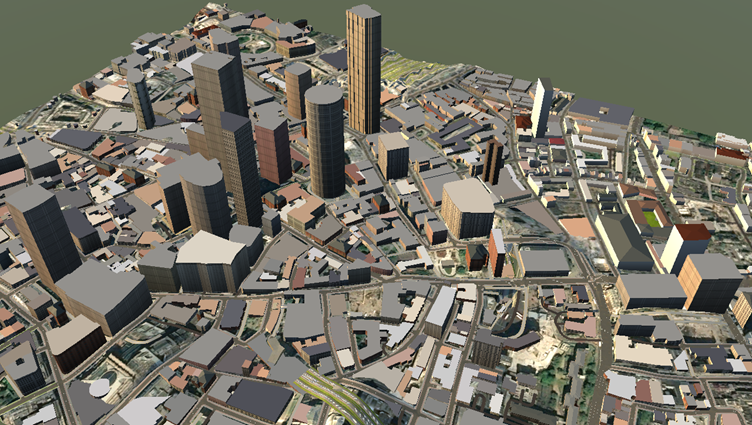
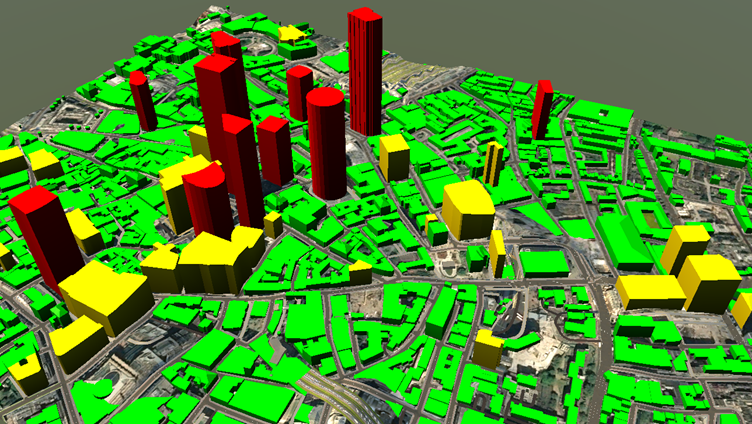
The result will show the buildings colour-coded according to the ranges of height that we specified.
If you need assistance with your models, whether its establishing style rules, creating models, or supporting your activities, explore our consultancy services and talk to us today.
Reduce downtime and improve service efficiency with AI-powered troubleshooting. Learn how service teams use ilean to solve problems faster and capture knowledge.

Cybersecurity risks are not always caused by sophisticated attacks or major system failures. In many cases, risk builds quietly through everyday habits, overlooked processes, and limited visibility into where data is stored or how users interact with systems.

Learn how to reduce cyber risk through stronger security foundations. This month's bulletin covers home office security, legacy technology risks, vulnerability management, MFA, and cybersecurity best practices.