
How AI Is Transforming Daily Work in Service Teams
Reduce downtime and improve service efficiency with AI-powered troubleshooting. Learn how service teams use ilean to solve problems faster and capture knowledge.
An important part of a project design is the ability to express the information that it contains in text form. For this purpose, AutoCAD Civil 3D offers a selection of tools to generate different types of reports. In the following paragraphs we will go through all the possibilities that this software offers, from making use of the out of the box reports which are available to modifying their content and style or creating custom ones.
In part 1 we learned how to generate reports from AutoCAD Civil 3D, both with the default settings and with the personalisation of some of the fields, such as the client and owner’s data, the units or the number of decimal places.
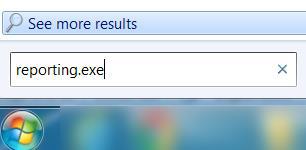
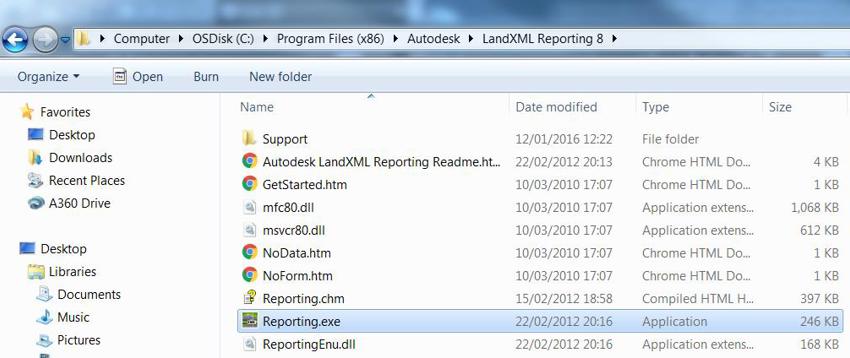
There is another application that is installed with AutoCAD Civil 3D that grants access to some additional functionality. It is the Autodesk LandXML Reporting tool, which is usually located in the following path “C:\Program Files (x86)\Autodesk\LandXML Reporting 8”. Alternatively, it can be found by typing “reporting.exe” in the search box of the Windows Start menu:
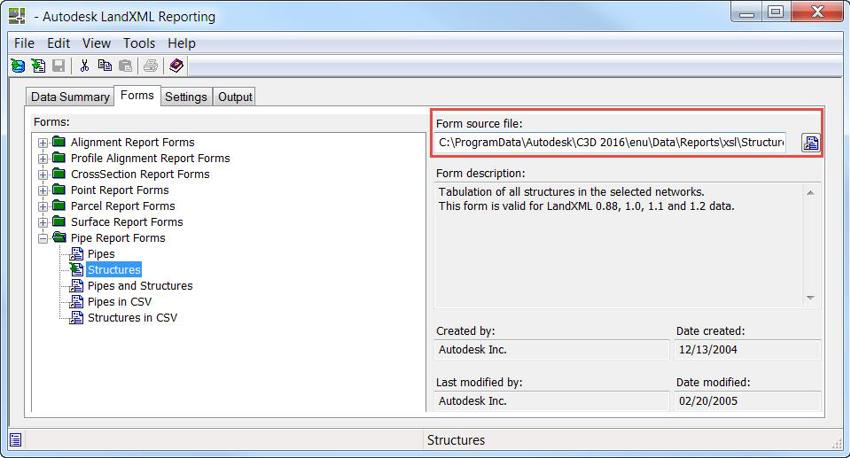
After launching the program, you can go to the Forms tab and select the report that you want to customise. In the top right hand corner you can see a text box where you can browse to the form source file. This will tell you where the style sheet of the report is located in your hard drive. The extension of this file is XSL and it describes how the report will be displayed.
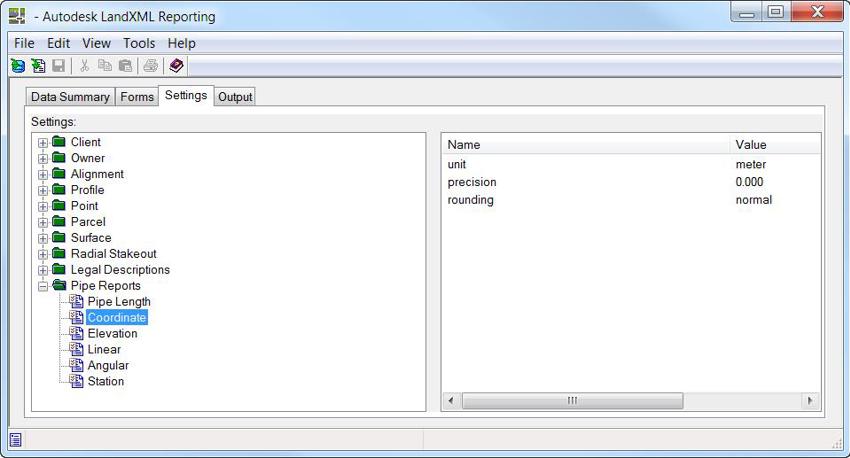
If you then go to the settings tab, you can change some of the values of the report, like we did previously in part 1:
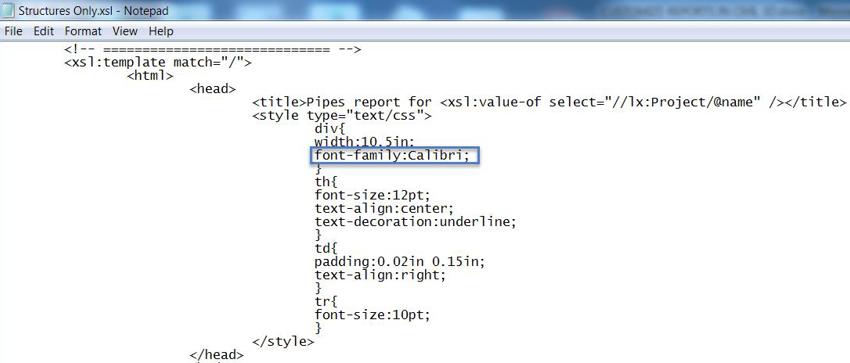
However, if we want to make changes to the style of the report we will need to modify the XSL file itself. In order to do that, we first need to browse to the location of the file in our hard drive, which we found out before in the ‘Form Source File’ text box. You can then go to that path and open the XSL file in a text editor for editing.
For our example, we are going to change the font type and combine the two columns for Rim and Sump Elevation into one. Following is a snippet of the XSL file for our example before and after these modifications; the edit made to change the font type is highlighted.

After editing the XSL file, the new report will look like this:
Editing an XSL file requires you to be familiar with its syntax. An incorrect modification of the file can lead to the report not being generated at all. Therefore, before you attempt to make any changes, it is strongly recommended that you create a backup of the file so that you don’t lose the original one should you need it.
As an alternative, instead of modifying the XSL default files directly, you can edit a copy of the file or even create a new one if you know how. In that case, you would like to have a way to include that report in your AutoCAD Civil 3D application to be able to run it from there. We will go through this process in this last example.
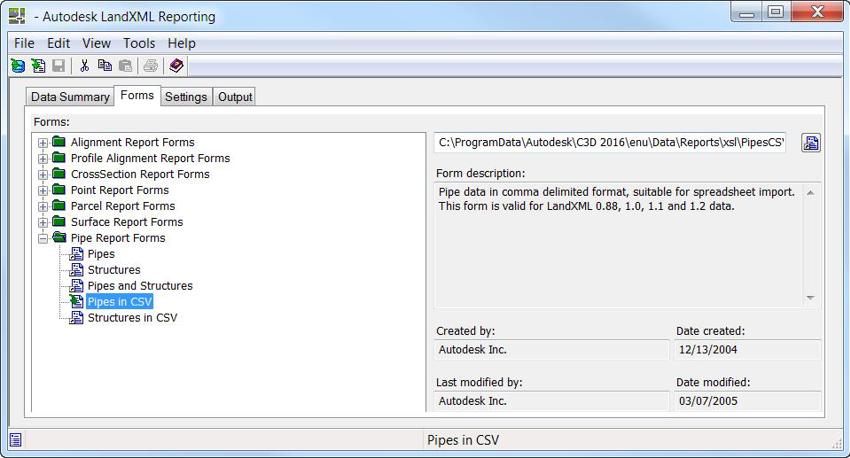
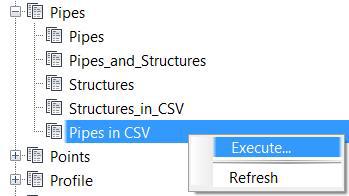
If you have a close look at the reports that are listed in the forms tab of the Autodesk LandXML Reporting tool, you will notice that some of them are not available in AutoCAD Civil 3D. To illustrate how to add a custom report to AutoCAD Civil 3D, we are going to include one of such reports, namely “Pipes in CSV”.
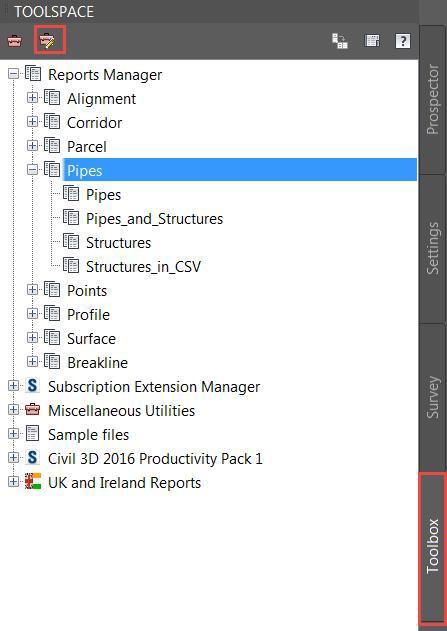
Within AutoCAD Civil 3D, in the Toolbox tab, click on the icon “Edit Toolbox”, as shown below:
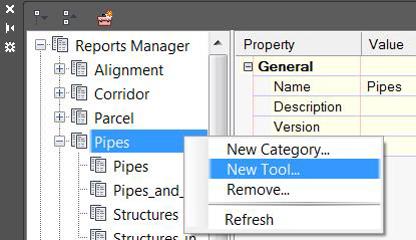
Right click in the category where you want to add the report and click on ‘New Tool’:
Fill in the values as shown in the figure and don’t forget to click on Save when you have finished to add the report to the toolbox:

Under ‘Execute file’, you could have input the full path to the XSL file, that can be found in the forms tab of the XML Reporting tool, as we have previously seen. However, in order to be consistent with the way the path is expressed in other reports, we refer to the folder where reports are stored by using the keyword %ReportDir%. You can find out where the report folder is located in your computer by typing regedit in the search box of the Windows Start menu to access the Windows Registry and then browsing to HKEY_CURRENT_USER\Software\Autodesk\LandXML Reporting\8\Settings\.
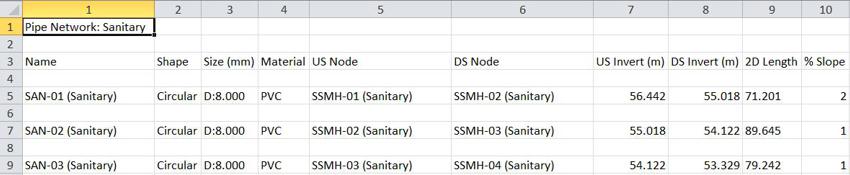
You can now find this report in the Toolbox tab of Toolspace, along with the default ones. If you now right click and click execute, an excel spreadsheet will be open showing the results.
Reduce downtime and improve service efficiency with AI-powered troubleshooting. Learn how service teams use ilean to solve problems faster and capture knowledge.

As organisations continue to adopt AI, expand their cloud estates, and support more flexible ways of working, the security landscape is becoming more complex. The challenge in 2026 isn’t just preventing attacks, it’s maintaining visibility, protecting data in new workflows, and ensuring the business can recover quickly when disruption occurs.
The construction industry is entering a new era, and Bluebeam is once again leading the way. In 2026, Bluebeam Max will launch as a new premium subscription that combines the power of Revu with advanced AI technology. This blog highlights just some of features you will expect to see within Bluebeam Max.