
How AI Is Transforming Daily Work in Service Teams
Reduce downtime and improve service efficiency with AI-powered troubleshooting. Learn how service teams use ilean to solve problems faster and capture knowledge.
Due to the current situation it may be that you are required to work from home but continuing to share data concurrently with colleagues. There are a number of methods available to you that you may be able to utilise.

Autodesk Desktop Connector is available to download here. It is an install that allows you to add drives to your standard windows explorer. These Drives will map directly to a cloud-based data source online.
The available and most commonly used drives are Fusion Team and Autodesk Drive. Both Drives have online viewers, allowing customers or colleagues to view files without having the software installed.
How to install/setup Autodesk Desktop connector and drives
Install the desktop connector and run the ‘.exe’ file from the link above, and follow the install setup through.
If not already, sign into your Autodesk account that is linked with your Autodesk subscription.

If you have a drive linked with your account you can add these drives to your explorer, once you have installed these from the website. To setup a drive, follow the links below.
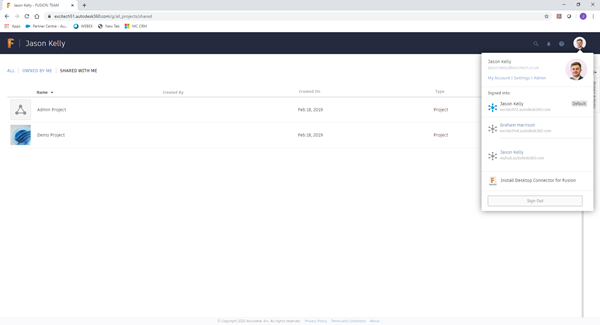
Fusion Team - select access now
Autodesk Drive - select get started
In your account on both Autodesk Drive and Fusion Team you will be able to select on the icon and choose to install the desktop connectors for both.

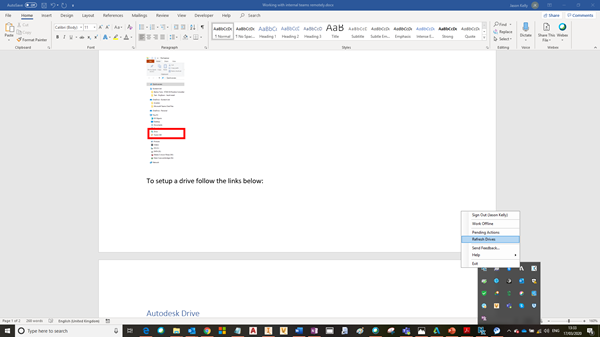
You can then also refresh these drives by going to the Autodesk desktop connector in the taskbar in the bottom right and selecting ‘Refresh Drives’.
If you have any issues with Fusion Team and have used A360 hub in the past, this may be due to your account not being switched over. You can find support on how to switch the account over here.
Autodesk Drive is a cloud-based data management solution provided by Autodesk which is included with any subscription account. With an active Autodesk subscription, you will be entitled to 25GB of data.
What can you do in Autodesk Drive?
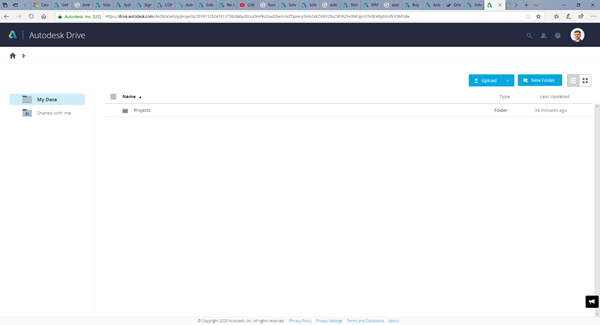
Upload Data
Create a folder structure in your ‘My Data’ folder by using the standard windows functions (right click > New Folder)
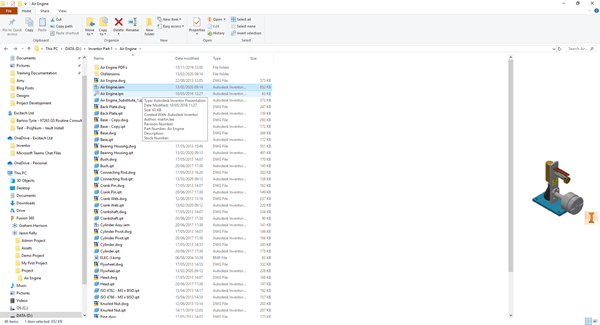
Drag and drop the assembly you wish to upload to the desired folder in Autodesk Drive.
Select on the Inventor project file used to create that file. This will then copy across all files associated with the assembly and will also keep the folder structure.

Using the online platform
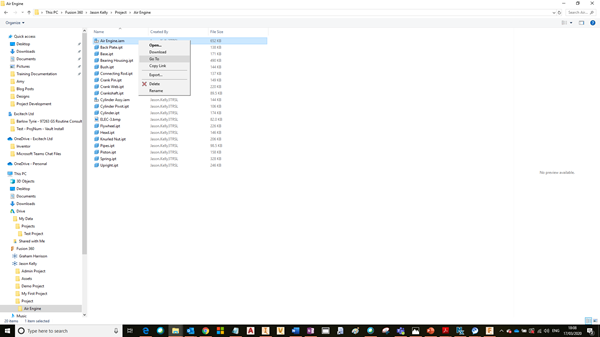
In windows explorer right click on the assembly file and select ‘Go To’.
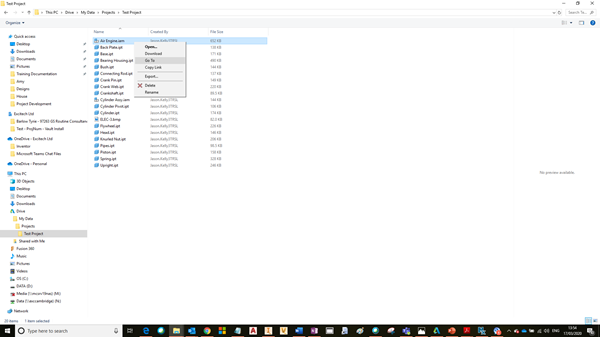
This will take you to your cloud drive. From here you can download any files to your local machine as well as share folders.
Sharing your Drive
This is key to working with your colleagues. You will need to share your drive with your colleagues to allow them to see your files and be able to access them. In the top right-hand corner in your drive account you will see an icon with two people.
Select this and then choose ‘Invite’. Add the email addresses of the colleagues you wish to share this with.
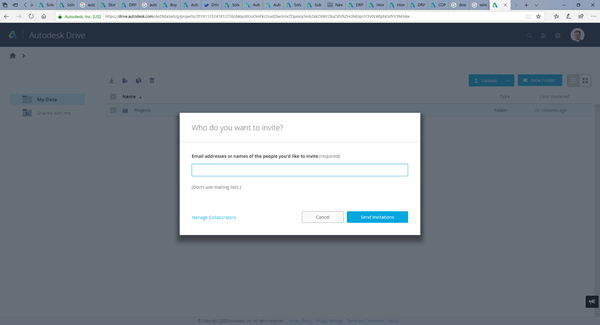
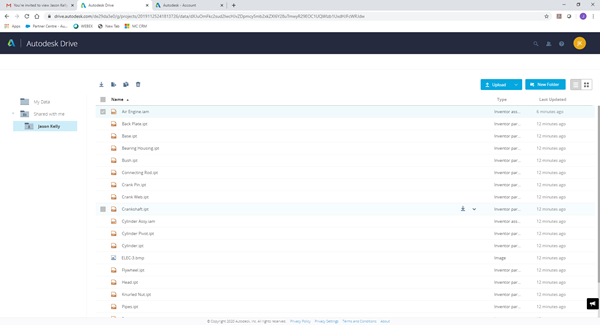
This will then appear in their ‘Shared with me’ folder. They can then download and upload files to your drive for you to be able to work on.
If you want any more information on Autodesk Drive, you can find the help guide here.
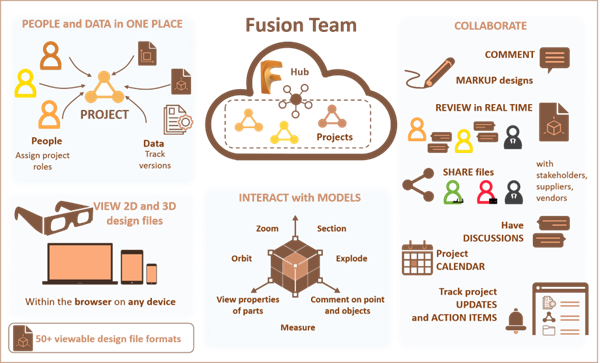
Fusion Team is another drive you can add once you have the desktop connector installed, this is mainly designed around working on projects. Here is what you can achieve in Fusion Team:
Creating a project
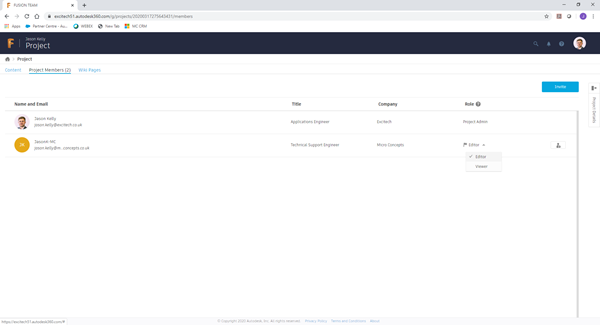
The first thing you will need to set up is a new project. Select ‘Create New Project’, give it a name and then go to the ‘Project Members’.
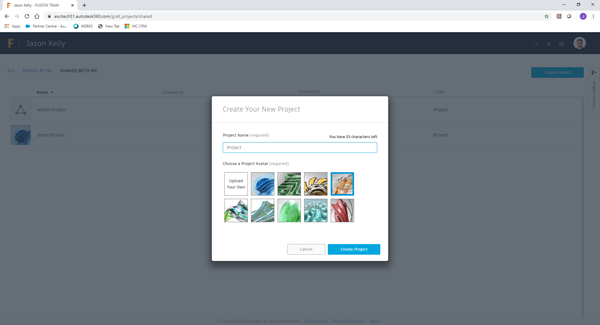
As with Autodesk Drive select ‘Invite’ and add the necessary users. In the drop down you can then either make them an editor or a viewer.
The new project will then be accessible in their account.
Uploading files
There are a number of different methods of uploading files to Fusion Teams. Firstly, as with Autodesk Drive, you can drag and drop a part/assembly file into the required folder.
This will again prompt you to choose the project file used to create the file and will copy across all necessary children files, and also retain the folder structure.
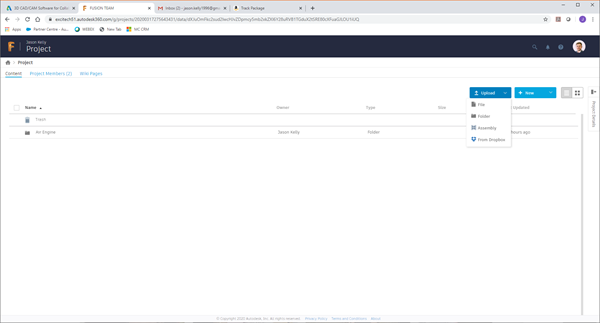
Another method is to use the upload on the online portal. This will give you the different upload options as shown below. These can then be pulled from your local machine, or from Dropbox.
Using the online platform
As with Autodesk Drive, in windows explorer right click on the assembly file and select ‘Go To’.
This will take you to the online platform where you can access all the files.
If you would like any further assistance or guides on how to set up and work with Fusion Teams, you can find it here, (Autodesk Desktop Connector section).
OneDrive is included in your Office 365 account and works very similarly to the Autodesk Desktop Connector. It is again a cloud-based solution that adds a drive to your explorer. This is provided by Microsoft and therefore adds a couple of extra steps in order to bring in assemblies. A positive however, is that you can collaborate with live project files if you have this set up. You can find a guide on how to get started with OneDrive here.
You will need to Pack & Go assembly files directly into these folders. All files will also need to be stored on the dive otherwise when opening on a different machine the links won’t be able to be resolved. For new models you can save and point them directly to these folders.
Setting up a OneDrive Project (.ipj)
To save directly into the OneDrive folder you will need to set up an Inventor project file. It is recommended that you only set up a single user project file when using OneDrive.
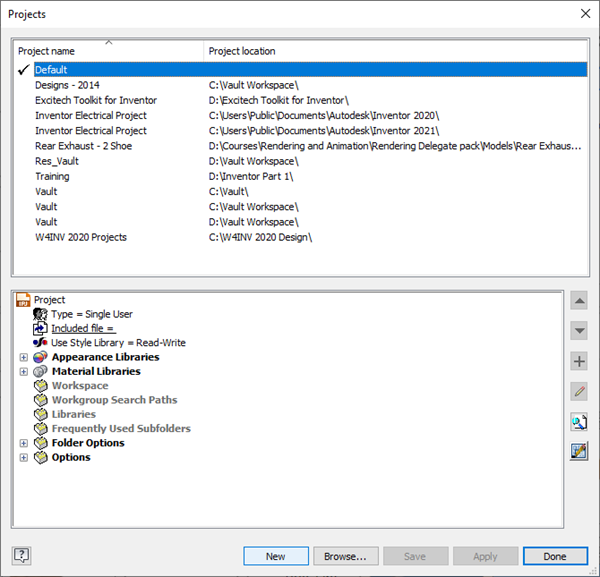
In Inventor go to File > Manage > Projects
Select new at the bottom
Select Single User Project and choose next.
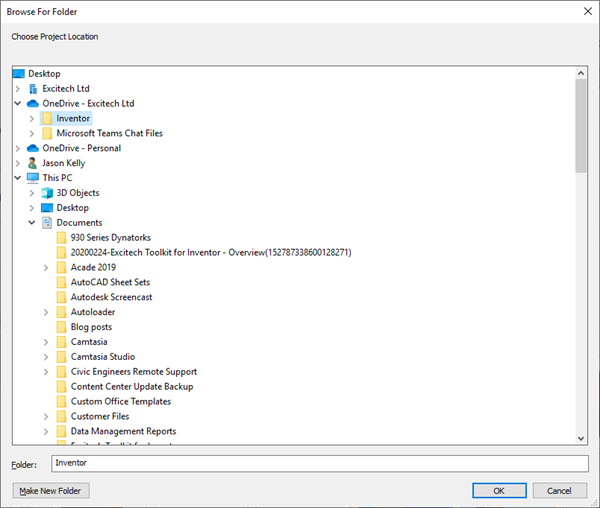
Give an appropriate name and then select on the three dots next to Project (Workspace) Folder and choose the folder in the Shared OneDrive.
Add any libraries you wish to bring across by using the arrows.
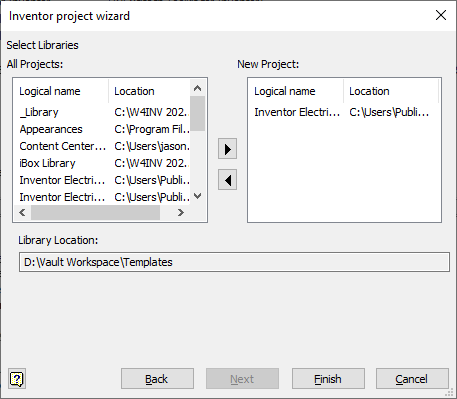
Select Finish and your new Project is created.
If you wish to be all working using live templates, design data, and content centre files you can copy these files to a location in your OneDrive folder. You can also copy these to the default locations on your C: drive and point them here but note, if any changes are made this won’t be replicated across your team.
If you are unsure where these are, follow the step below on your previous project and follow this directory in windows explorer.
To edit these locations, in your project go to ‘Folder Options’ > right click on a section > select ‘Edit’ and point it to the location in your OneDrive folder. Repeat this process for the necessary folders.

Any changes made to for example the templates, will then be updated across all machines as long as the files are downloaded. Essentially OneDrive is now working as a server.
Now, when you create new files you will notice that your workspace is automatically set to your OneDrive folder allowing you to work concurrently with your team.
If you would like further information on working with internal teams remotely, please call 0345 370 1444 or email info@symetri.co.uk.
Reduce downtime and improve service efficiency with AI-powered troubleshooting. Learn how service teams use ilean to solve problems faster and capture knowledge.

As organisations continue to adopt AI, expand their cloud estates, and support more flexible ways of working, the security landscape is becoming more complex. The challenge in 2026 isn’t just preventing attacks, it’s maintaining visibility, protecting data in new workflows, and ensuring the business can recover quickly when disruption occurs.
The construction industry is entering a new era, and Bluebeam is once again leading the way. In 2026, Bluebeam Max will launch as a new premium subscription that combines the power of Revu with advanced AI technology. This blog highlights just some of features you will expect to see within Bluebeam Max.