Streamlining Autodesk Deployments: How CQi Simplifies the Installation Process
For many organisations, Autodesk software is mission-critical — used daily across design, engineering, and construction teams.

This Technical Document explains further how to edit the Inventor Standard Content Library

In Part 1, we looked at manually editing the Part Number of a family of components. In this document we will look at automating that process by using Expressions.
In this example we are required to set the filename to have a company specific Code that denotes the fastener as being a bolt, but this must then be followed by the nominal diameter and length of the fitting.
The part numbers for this family are required to match the filename.
First, to make the table easier to deal with, we will create a custom view within the table:
Open the Content Center Editor and Browse to Fasteners > Bolts > SocketHead > ISO 4762 (We copied this family to our read/write library in Part 1) Right click and select the Family Table.

Columns can be selected to be ‘hidden’ Right clicking on the name of a column will bring up a context sensitive cursor menu. One of the options on this menu is ‘Hide’
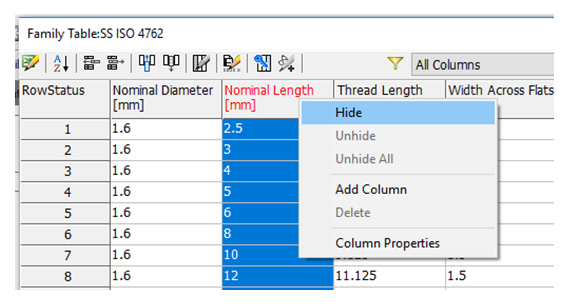
N.B. It is possible to select multiple columns by selecting a heading and then dragging the mouse to the left or right to select adjacent columns, the selected columns can then all be hidden at once.
Using the above method, hide all columns except the Filename Column and the Part Number column.

Notice that once you have done this the drop-down list automatically changes to a custom view. To test this, drop the list down to ‘All Columns’ and then back to ‘Custom’ View
Next, we want to set the filename column to be SCRW (the company code for screws), followed by the nominal diameter of the screw and then the nominal length of the screw.
Right mouse button on the File Name column heading and select Column Properties.
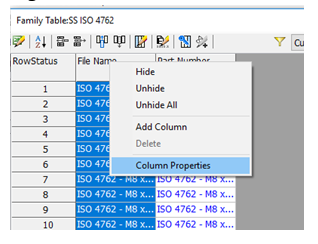
This will launch the Options dialogue box for that column.
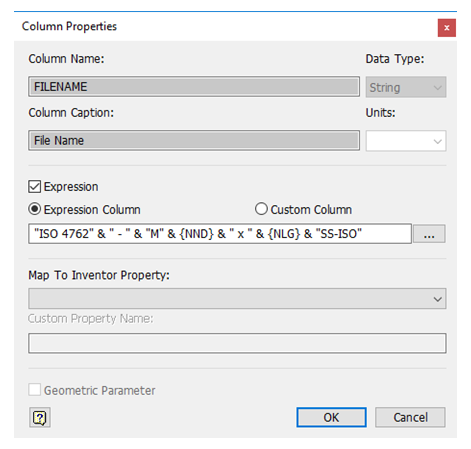
Note that in this case the Filename already contains an expression. If not, it would be necessary to tick the tick box next to the word Expression to make the field live.
Clear the contents of this field and type SCRW.
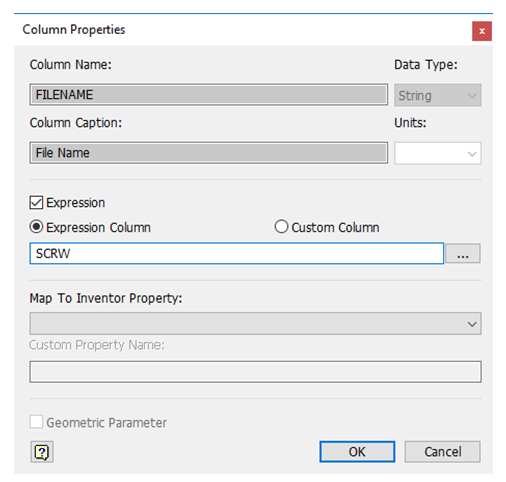
Next press the button to the right of this field. This lists the parameters available for use in this Field.

Double click NND (Nominal Diameter). This will add it to the field.

Type x and then add in NLG (Nominal Length) from the parameters list.

Click Ok.
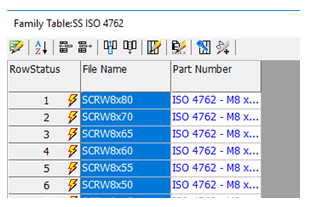
The column should update with the new values
N.B. The fields are flagged as out of date
Next, we will set the PartNumber to match the Filename:
Right Mouse Button on the Part Number field and select properties.
Clear the Expression field and select Filename from the properties window.
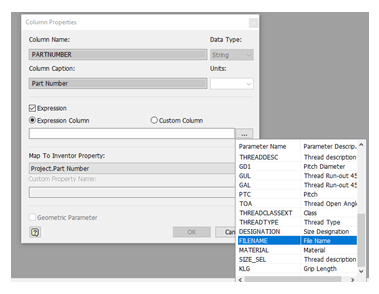
This uses the value for the Filename in the Part Number Column.
Select OK and press Apply.
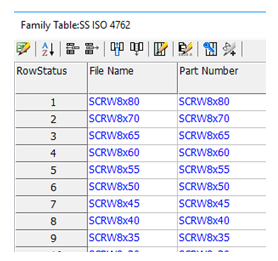
Once published examine the Filename and Part Number Columns, they match exactly.
Click OK and close the Content Center Editor. Then start a new assembly and Place from Content Center. From the Key columns select M10 x 20 mm.
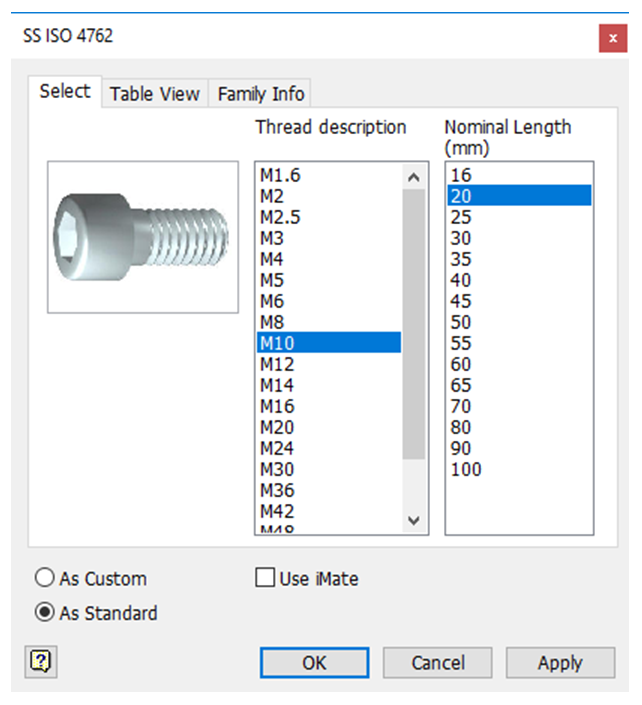
Using the Insert button insert an M10 x 20mm long version of this fastener.
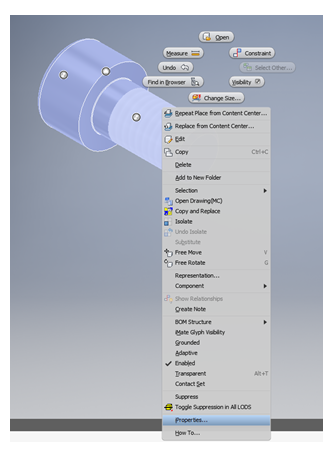
Right Mouse Button on the Part and select Properties to verify that the Filename & Part numbers are in our new format.

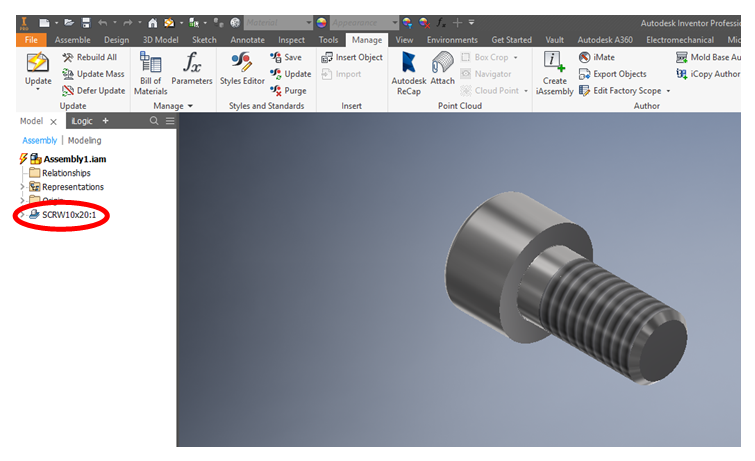
However, if you examine the Display Name in the browser it is still being referred to as ISO 4762 M10 x 20:1. We also want this to match the Filename.
N.B. The ‘Browser Rename’ command in the Micro Concepts Tools could also be used to achieve this.
In this case we will create a new column in the Content centre, set it to use the filename, and map it to the display name.
Go to the Manage tab on the top toolbar and Select ‘Editor’ from the Content Centre menu.
Once the Content Centre has opened right click on the part you want to change and select Family Table from the list.
To add a column, right click on any column heading and select Add Column from the menu.
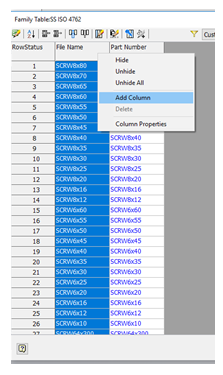
This will create a new column and launch the property dialogue box for that column.
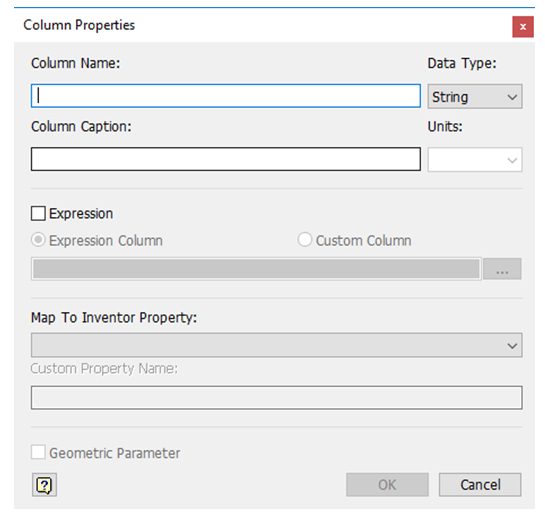
Change the Column name to Display Name (Spaces are not allowed)
Enter a Column Caption – Browser Name
Tick the expression check mark and select Filename from the parameter list
Use the Drop-Down List on the ‘Map to Inventor Properties’ field to select Member.Display Name
Click OK
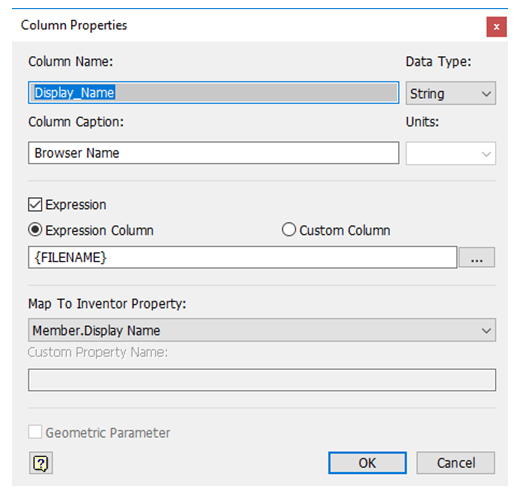
Examine the new column and see that it matches the Filename Column.
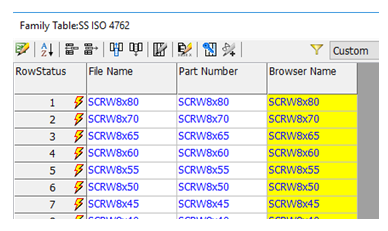
N.B. This was not actually necessary, we could have edited the properties of the Filename Column and Mapped that directly to the ‘Member.Display Name’ but for the purpose of this exercise it shows how additional columns can be created and mapped to existing columns.
Click Apply and Publish to the Content Centre.
Click OK and close the Content Center Editor,
Save the Assembly,
Select the Refresh Standard Components from the manage ribbon.
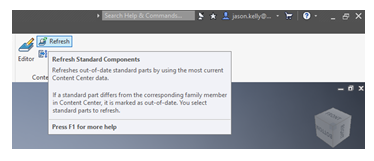
This will highlight any components in the Assembly that are out of date to the Current Content Centre:
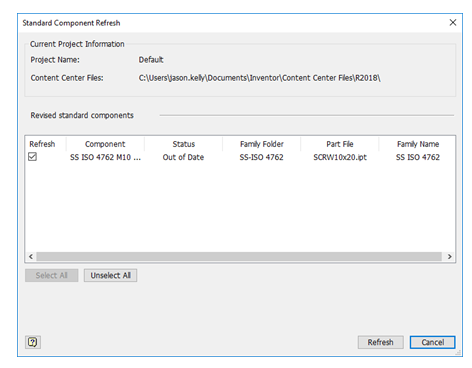
Select Refresh to update the standard content,
The Assembly will then automatically update,
Note that the Browser name has now updated to reflect the new Column.
You can access Part 1 of the Technical Document by clicking here: Autodesk Inventor | Customising the Content Centre – Part 1
If you would like more information on Inventor or this Technical Document, please contact us on 0345 370 1444 or email info@symetri.co.uk.
For many organisations, Autodesk software is mission-critical — used daily across design, engineering, and construction teams.
Discover how combining CQFlexMon with CQI provides a complete solution for CAD software deployment and monitoring. Improve software efficiency, reduce risk, and streamline your IT operations.
Cybercriminals are always evolving, and so should your defences. This month, we shine a spotlight on three often-overlooked yet critical security concerns that could put your business at risk.
