
Stay Ahead of Evolving Security Threats
Cybercriminals are always evolving, and so should your defences. This month, we shine a spotlight on three often-overlooked yet critical security concerns that could put your business at risk.
I was asked a few weeks ago about the Excitech Toolkit for Revit, specifically, which were the tools I used most, and hence the subject of this blog.
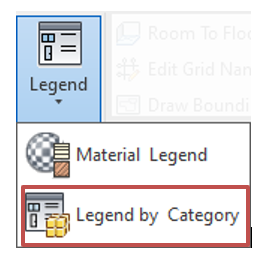
The Excitech Toolkit for Revit contains a great many useful additions to the standard Revit functionality, but I will focus on just a few here. My first choice has to be “Legend by Category”; every time I teach Revit Architecture, I dread the time that I will have to introduce students to the “Legend” view. Why is this tool still such a tedious, and manual exercise? Unable to even distinguish between those elements placed into a view and those simply loaded into the project. But no more! I introduce you to:
There are a number of outstanding features in this single tool:
Configuring the tool is simplicity itself; after selecting the category required (door, window, wall etc.), select a suitable layout, select some parameters to include, decide on how you would like them sorted, and press the button.
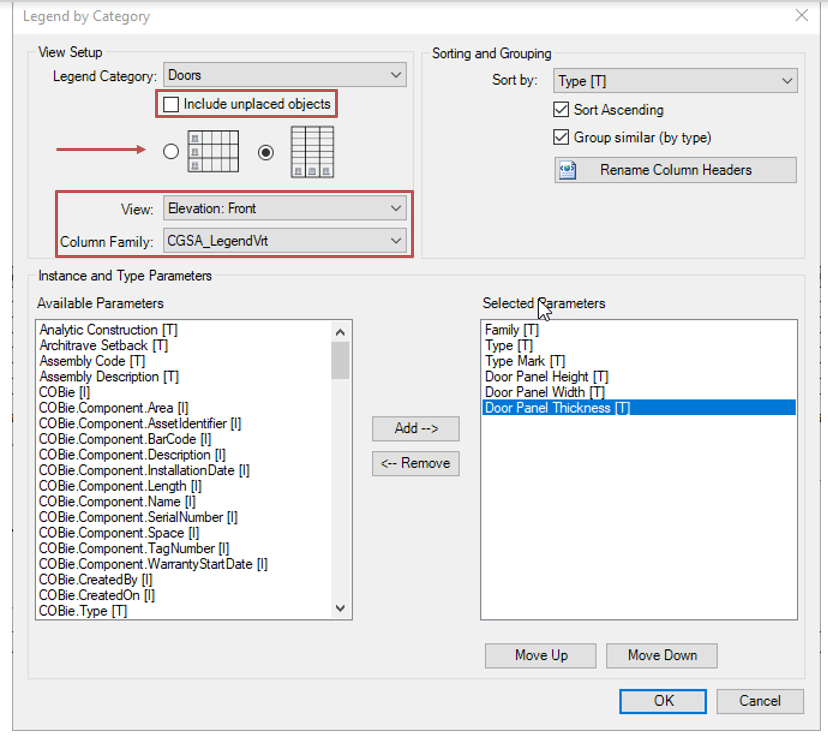
You will notice, in the image above, that you must override the default if you should require a legend that includes un-placed objects. After that, you can choose from either a horizontal or vertical layout (my favourite is the vertical), each option providing a choice of family to use to create the grid, and which orientation to use for the legend component (elevation, front view etc.)
Choose the parameters that you would also like to show, sort order, and even rename column headers if you like, then press “OK” and stare in wonder at your mastery!
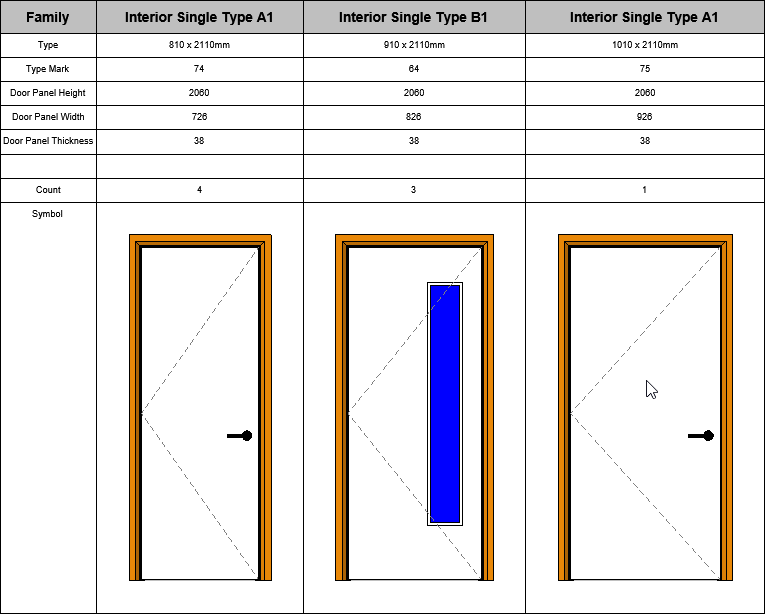
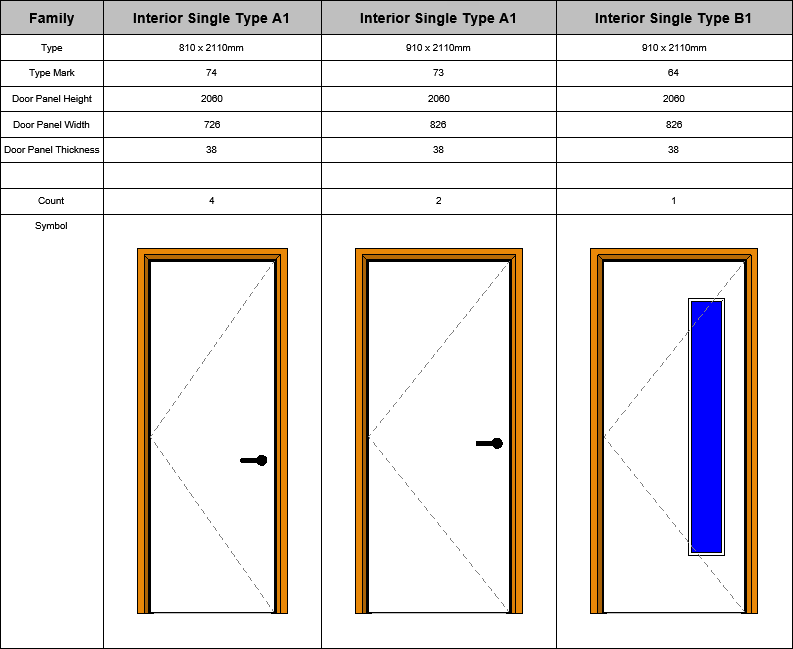
Notice that there is also a count of each element used. If something doesn’t suit, or if you simply wish to explore other layouts, just fire up the tool and have another go. Try changing some doors in your project and then re-run the tool; it never fails to make me smile!
Another firm favourite from the Excitech Toolkit for Revit is “Room to Floor.” This allows for a specified floor type to be placed below any selected rooms, even allowing an offset from the level to be entered; a great tool for adding floor finishes as real Revit floor objects, that can be scheduled, or used in visualisation views.
You first select the rooms,
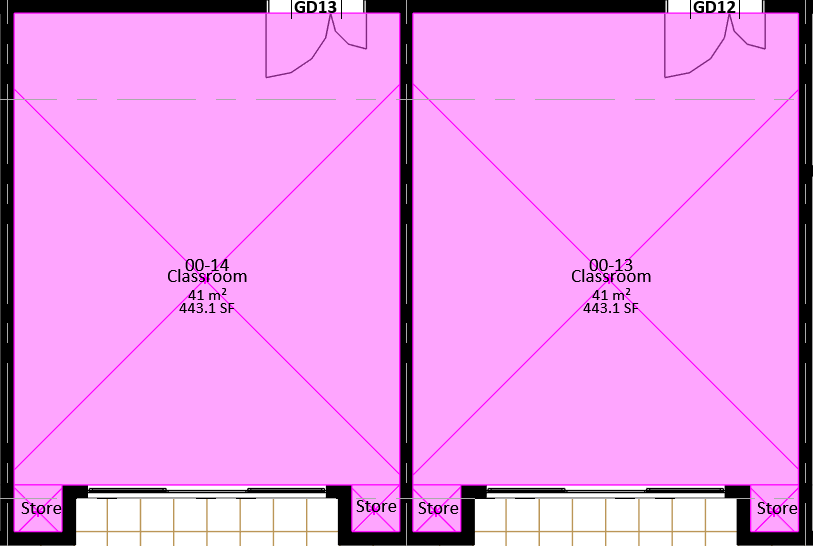
Then run the “Room to Floor” from the Excitech Toolkit ribbon.

There are options for selecting the floor family, level, and offset. Additional settings allow you to choose the location from within the wall build-up to use as your floor boundary, and to union floors that have coincident edges. Press “OK” and view the result.
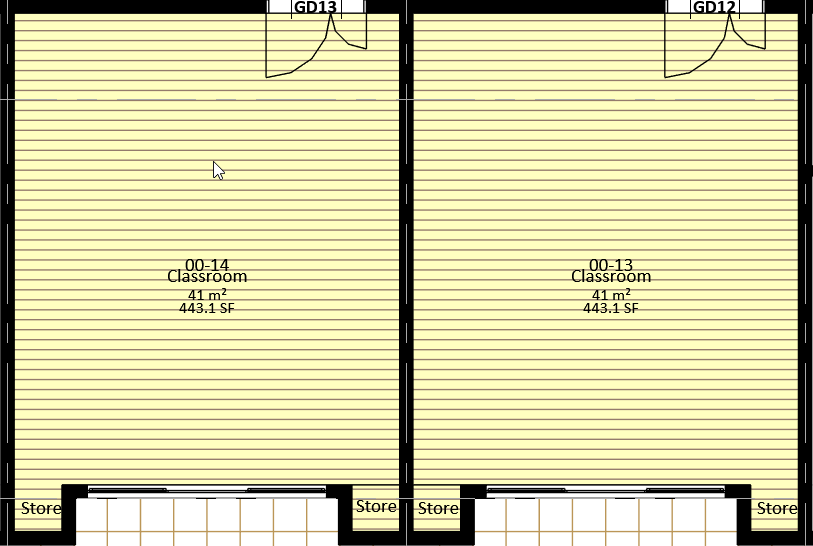
I appreciate that this floor doesn’t flow into the door, but I only have to edit the floor to amend this instead of creating them all manually.
You can find more information on all the tools available in the Excitech Toolkit for Revit here: https://www.symetri.co.uk/en/Products/Excitech-Toolkit-for-Revit.
Cybercriminals are always evolving, and so should your defences. This month, we shine a spotlight on three often-overlooked yet critical security concerns that could put your business at risk.
A well-designed archiving solution ensures the long-term integrity, accessibility, and compliance of project information - preserving critical records while mitigating risks. In this blog post, we explore why data archiving is no longer optional, but essential, and introduce ArchiveHub

At Symetri, we understand the importance of tailored education and deliver exceptional training solutions, available both in our classrooms or through our unique Virtual Classroom. Here, we explore the many advantages of committing to a learning path with Symetri and how it can transform both personal and professional growth.