
How AI Is Transforming Daily Work in Service Teams
Reduce downtime and improve service efficiency with AI-powered troubleshooting. Learn how service teams use ilean to solve problems faster and capture knowledge.
Many of us have been modelling and detailing reinforcement in Autodesk Revit for several years, some of you may still be using manual 2D solutions such as AutoCAD and Microsoft Excel.

If you are 3D detailing, are you really getting the most from your investment in Autodesk Revit? Are you modelling and detailing rebar efficiently? From a contractor’s point of view, are you using all the information from the model to manage prefabrication, safety and coordination? These are some of the areas we will investigate within this post.
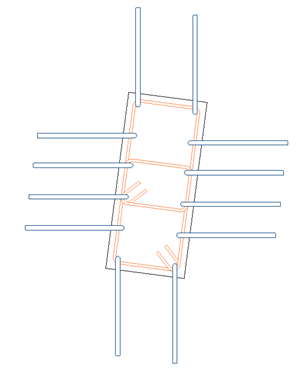
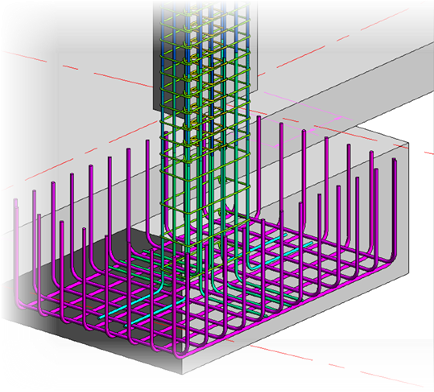
Every release of Autodesk Revit brings additional rebar modelling and detailing tools that provide opportunities for different workflows and options for modelling rebar. For example, in Autodesk Revit 2022 we now can move rebars in a set. The obvious uses for this tool are to omit bars that are not required or move bars that clash. However, you can also use this tool for staggered rebar layouts or any situations where you have the same rebar shape and diameter but in an unusual layout. The below example shows a column tying into a slab, the rebar is still in a rebar set but has been rotated.
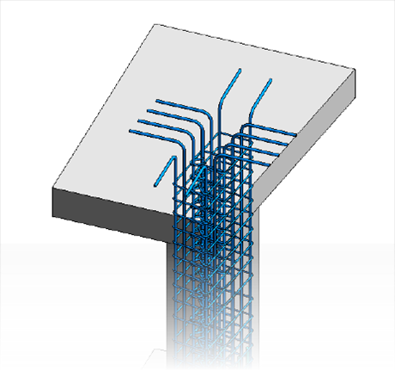
Freeform rebar was introduced in Autodesk Revit 2019 and was intended for the reinforcement of complex elements such as bridge decks, abutments and piers as well as curved elements. However, the freeform rebar can also be used for elements such as square and circular columns to place the main reinforcement and keep these in a rebar set.
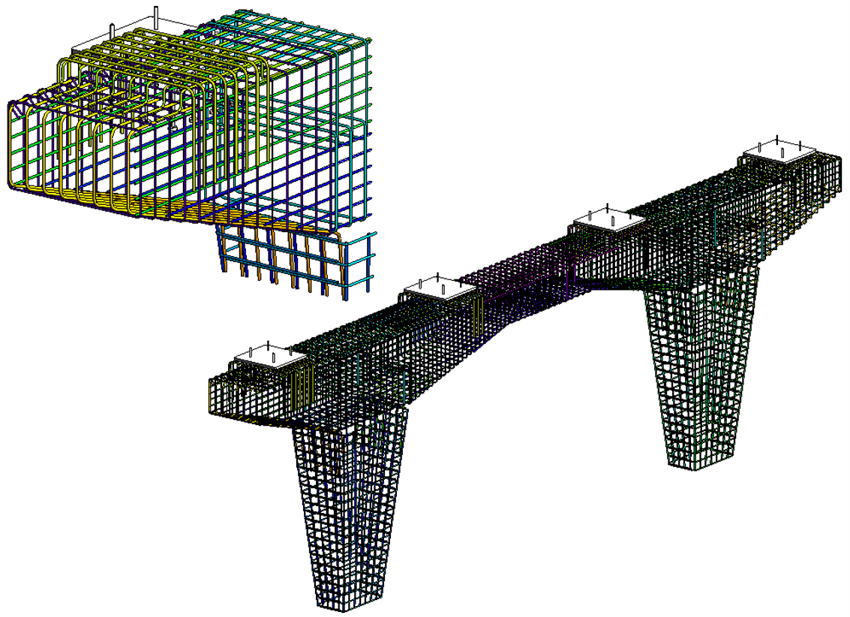
Freeform rebar and rebar constraints can be used to great effect when detailing complex elements which have tapers and varying rebar ranges. Rebar laps can be maintained with the rebar constraints by constraining the ends of the bars. The image below shows a complex bridge pier from Autodesk Infraworks that is detailed in Revit using a combination of freeform rebar and standard rebar sets.
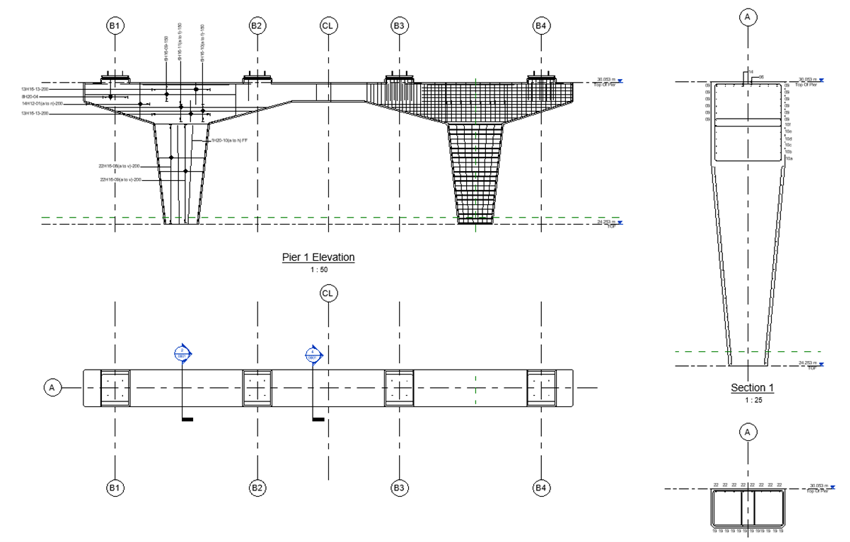
One of the best features with Autodesk Revit is the ability to cut sections, plans and elevations wherever required and create drawing views. In the image below you can see the same bridge pier showing a typical elevation with the rebar presented and tagged. Sections can also be prepared and tagged to show bar marks and tick and tags.
When detailing common elements such as columns, beams, foundations, or walls, you can utilise the Free Naviate Rebar Extension toolset which has a good selection of macros to place rebar into typical concrete elements.

However, as well as providing automation to the reinforcement of these typical elements you can also access the tools on the right-hand side of the ribbon to manage the visibility of rebar both in 3D and 2D views. This is a huge timesaver when working with any reinforcement in Revit.
Another great tool is the interference of reinforcement bars. This tool will check for clashing rebars but also applies processes to allow for tolerances. For example, you could potentially ignore clashes on a 8mm diameter bar, or you can apply a tolerance of a few millimetres.

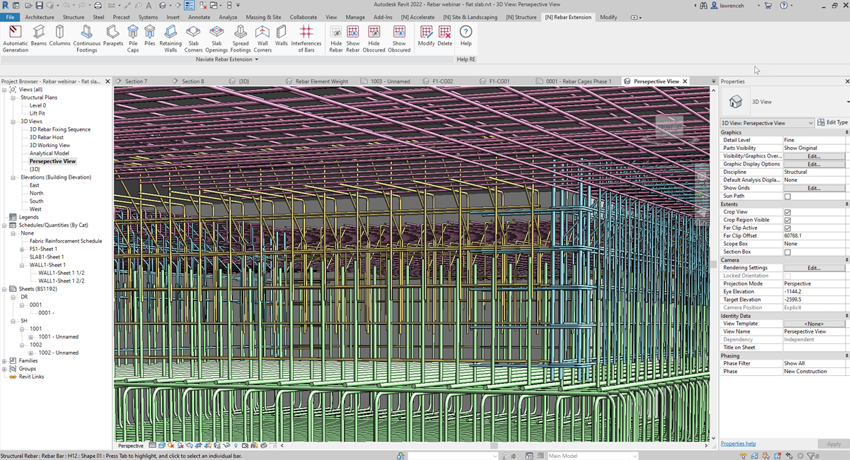
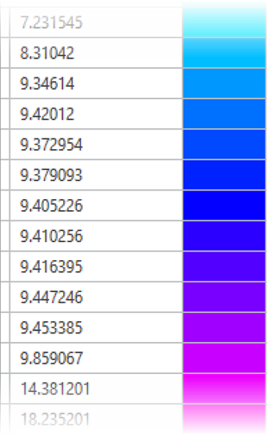
Most contractors are very much aware of the benefits of BIM and are using federated models to plan the virtual build as well as all the other activities such as clash, coordination and quantification. Another useful tool is the ability to colour reinforcement bar by the element weight. This is particularly useful when thinking about the safe manual handling of individual rebars on site. In the example below, the element weights are coloured with filters. The pink bar is currently 18.2 Kg.
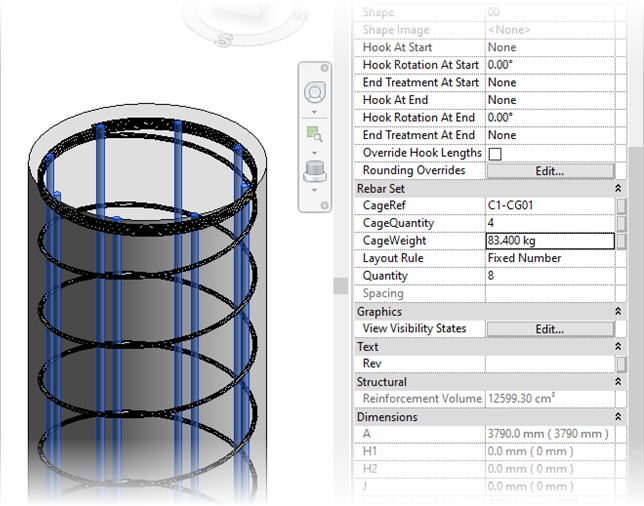
Another useful function is the planning and scheduling of reinforcement cages. Of course, rather than tying and fixing steel on site which is time consuming and less accurate the reinforcement cage can be bent and tied in the factory. The cages can then be craned into position. Note that the cages are referenced, and the total weight of each cage is scheduled.
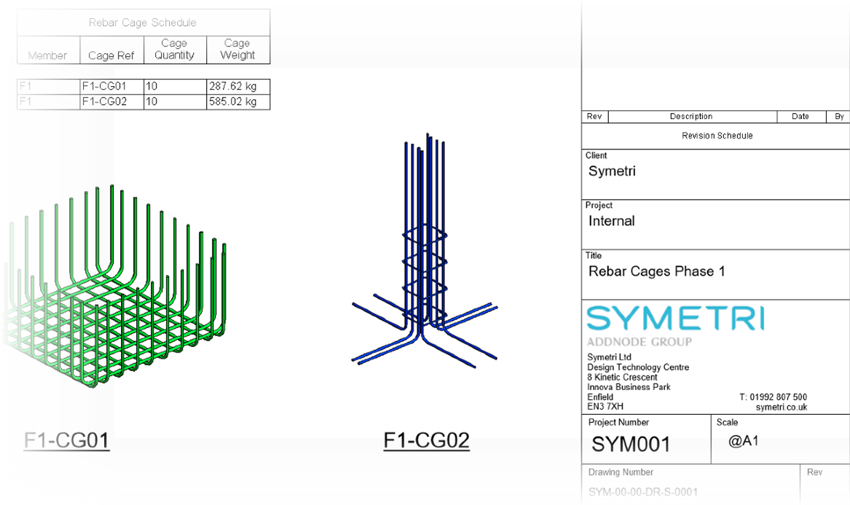
Fixing sequences are also added to each rebar and cage which facilitates full construction sequencing in Navisworks and the associated animations. As well as seeing exactly how the steel is fixed you can see any potential errors where cages will not fit or clash with other elements.
All the features and outputs that we have shown above are delivered with our Symetri rebar template and Naviate Reinforcement Extension. The Naviate Reinforcement Extension is free and can be downloaded from the following here.
The Symetri rebar template has all the new shape codes and bending schedules according to the new BS8666:2020 standard. Also, the weight of each bar is calculated along with tags and details to produce rebar drawings and documentation. This template is provided free of charge when you attend our 1 day Reinforced Concrete Detailing for Autodesk Revit training course. You can find out more about this training course here.
I hope this has been insightful and inspires you to start detailing with Revit in 3D! Happy detailing.
For more information, please get in touch by emailing info@symetri.co.uk.
Reduce downtime and improve service efficiency with AI-powered troubleshooting. Learn how service teams use ilean to solve problems faster and capture knowledge.

Cybersecurity risks are not always caused by sophisticated attacks or major system failures. In many cases, risk builds quietly through everyday habits, overlooked processes, and limited visibility into where data is stored or how users interact with systems.

Learn how to reduce cyber risk through stronger security foundations. This month's bulletin covers home office security, legacy technology risks, vulnerability management, MFA, and cybersecurity best practices.