
How AI Is Transforming Daily Work in Service Teams
Reduce downtime and improve service efficiency with AI-powered troubleshooting. Learn how service teams use ilean to solve problems faster and capture knowledge.

As a Support Engineer at Symetri, I see a large number of problematic Revit models. Most of the issues I receive have a direct impact on the overall project which can cause major disruption and, with no built in recovery command, it is important to manage the projects to minimise the risk of Revit file corruption.
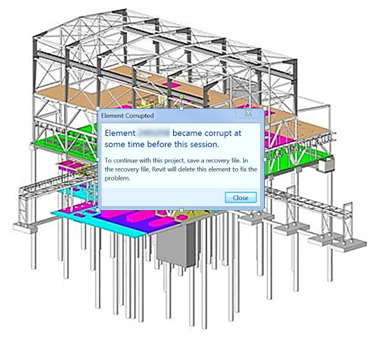
When I was at university, I had just started using Revit 2010 for my project work and questioned how different it really is in comparison to AutoCAD? It then dawned on me that Revit files were going to be considerably larger than AutoCAD files and sooner or later I would have to get the file size down. As the model bloated due to increasing detail, the risk of the file becoming corrupted and unusable increased. This meant either a heavy reliance on backup files or starting the project again when things went wrong, both of which can be extremely frustrating when deadlines are fast approaching.
After having to start again on more than one occasion due to large unmanageable over-modelled files I have learnt the hard way that it is important to have good file maintenance skills by making sure:

This is where I have really learned to utilise the Purge Unused command. In the last few years Revit projects have become really complex which normally means big file sizes. Purging a Revit model assists in removing unused families, views, and objects from a project. It is recommended that the model should be purged after every submittal and milestone to remove any remaining elements that have accumulated in the project. Revit’s automated purging method only removes certain elements within your project; therefore you still need to go through your models and manually remove any unwanted area schemes, views, groups, and design options. You should also replace in-place families with regular component families to further reduce the file size.
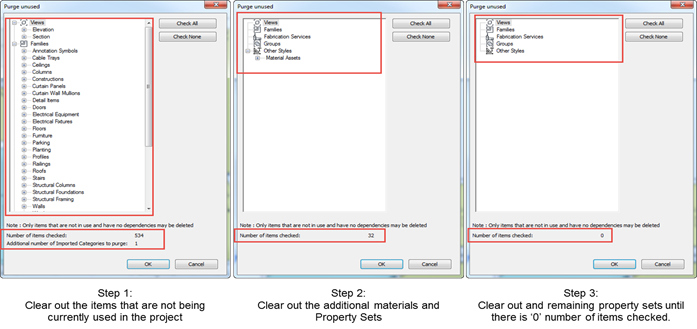
When you consider using Purge Unused it is important to understand how this works, mainly because in most cases should you require to remove any unwanted families objects and views you would need to employ the 3 step Purge process. The reason for this is when first using Purge Unused you can only see the items that are not being currently used in the project. This means that any families that are listed may be using materials that are in the project. So when you purge out a family, its materials now might be unused in the project and when you next launch the Purge Unused dialog you may see additional materials that can be purged from the project. As a recommendation it is also necessary to select the Check None button as your first step when using Purge Unused, then look for and select what you would like to purge. This is important because by default everything that can be purged is pre-selected. This means if you have an element in your project template, but you haven’t used it yet in the project, it will be removed and you’ll have to re-create it or re-load it.
The Purge Unused command can also be used on a family assuming Revit finds something that it thinks can be purged. A Revit family can grow its size from both nested families and imported CAD data. Importing CAD data into a family will bring across a number of different object styles as well. There may not be any present within the family currently, but if you didn’t create the family personally, it cannot be guaranteed what’s included.
Should any family element get bigger than expected, a simple Save As and naming it as a different name will reduce the file size down quite a bit. Using the Purge Unused command before and after the Save As could potentially reduce the overall file size. Should you however need the original file name to carry on then just rename it to something like “My-Temp-Family.rfa” and then rename the original and rename the new one to use the original name again. The key part is the Save As to a different name initially. This said, no matter how many times you use the Purge Unused command there are certain elements that cannot be purged using this command. These elements include Base system level families, families that are included in groups (even if the group is not used) and shared families within other families will not be purged.
So when does a file become too large? In retrospect, the maximum viable file size is determined by the total amount of RAM you may have. As a rule of thumb a Revit file should be, at the most, 1/20th the size of your RAM. So for example if you have 16GB of RAM, then it is recommended that you keep your file size to under 800MB. Of course should you exceed this limit, Revit will continue to work, but it will start using space on the hard drive to compensate for the lack of RAM. Even with a fast SSD, this will feel incredibly slow and in most cases is unusable.
Always remember to leave space for file growth because files that become large in the early stages will only grow larger in the subsequent design development stages. For example, if you have 16GB of RAM an overall guideline would be that anything below 200MB is safe. If the file climbs above 300MB in schematic design or design development stages, you should consider restructuring the model. Should it get above 500MB at any stage, then employing the Purge Unused command is strongly suggested.
For more information please visit our webpage here or contact us using the form below.
Please submit your enquiry here and a member of our team will get in touch.
Alternatively call 0345 370 1444
Reduce downtime and improve service efficiency with AI-powered troubleshooting. Learn how service teams use ilean to solve problems faster and capture knowledge.

Cybersecurity risks are not always caused by sophisticated attacks or major system failures. In many cases, risk builds quietly through everyday habits, overlooked processes, and limited visibility into where data is stored or how users interact with systems.

Learn how to reduce cyber risk through stronger security foundations. This month's bulletin covers home office security, legacy technology risks, vulnerability management, MFA, and cybersecurity best practices.