What’s New in Inventor 2027: A Guide to the Latest Features
Consultant Jason Kelly explores the new 2027 features in Autodesk Inventor Professional. Including updates to the content center and Autodesk Assistant

A common task in a Civil 3D project is to apply a dropped kerb to a road corridor. While it can be achieved manually using Civil 3D tools, the process is time consuming. Dynamo for Civil 3D is a tool that can help us automate this task. I will be describing how you can create a script in Dynamo to achieve this goal. For the script to work, you will need to import a custom node into Dynamo first. Both the script and the library to import the custom node are available to download.
Some familiarity with Dynamo is required to understand how the script works. YA common task in a Civil 3D project is to apply a dropped kerb to a road corridor. While it can be achieved manually using Civil 3D tools, the process is time consuming.ou can still use it even if you don’t know Dynamo with the use of Dynamo Player, as will be explained.
The script will create a region for the dropped kerb, including the transitions, and it will then change the kerb type to a dropped kerb using corridor overrides. It is assumed that the kerb is modelled using the ‘British Multikerbs (with transitions)’ subassembly, available in Civil 3D 2021 as part of the UKIE country kit. The region will be created by a custom node that I coded using the Civil 3D API, everything else will be done using standard nodes. Custom nodes in Dynamo allow you to add additional functionality that is not available in the nodes included with the application.
Let us start by importing the custom node. From Dynamo for Civil 3D, select ‘Import Library…’ from the ‘File’ pull-down menu and select Excitech.dll. You should now see an ‘Excitech’ branch in the Add-ons section of the left panel that contains the AddStations node. Click on it to insert it in the graph.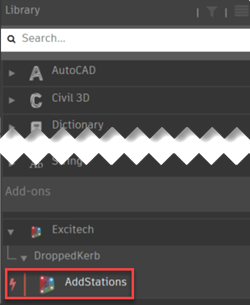
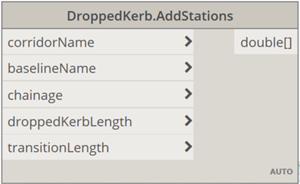
The DroppedKerb.AddStations node will create a region for the dropped kerb, including the transitions, centred around the chainage that is specified as an input. It will output a list with all the stations where the kerb type needs to be overridden to a dropped kerb. It takes the following inputs:
Using the custom node and standard Dynamo nodes, reproduce the graph below to get the baseline for the dropped kerb and the stations that need overriding. Note how a group was created for clarity, to indicate what the inputs are. The String and Number nodes used as inputs to the custom node have been renamed (by double-clicking on them) and defined as input nodes (right-click on the node and tick “Is Input”). This last step will allow us to edit the inputs directly from Dynamo Player without the need to access the Dynamo script.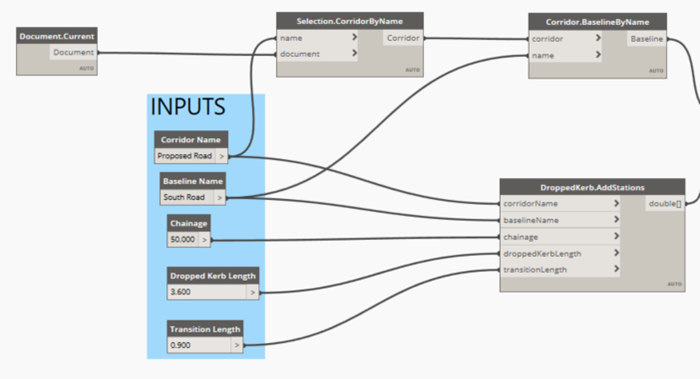
The next group will take the outputs from the previous step to obtain all the UKIE_Multikerbs subassemblies that need to be overridden to a dropped kerb type, using a boolean mask.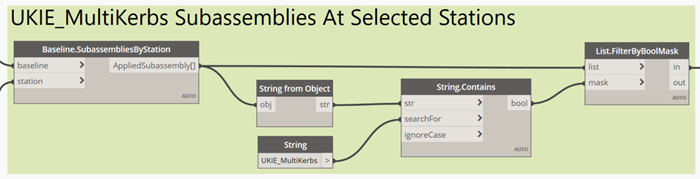
Starting from that list of kerb subassemblies, we restrict the selection to only the kerbs on the side that we want to drop according to the corresponding input node. An input of 0 will drop the left kerb, 1 will drop the right kerb and 2 will drop both.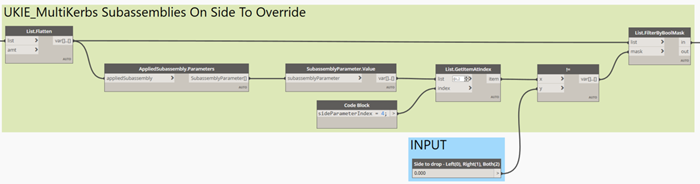
Finally, the kerb type is overridden for the corresponding subassemblies with the dropped kerb type selected in the input node and the corridor is rebuilt.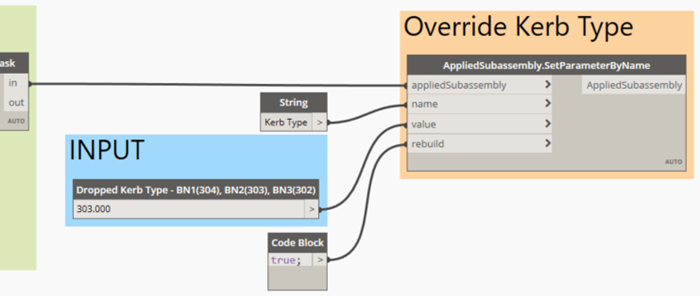
The finished dynamo script DroppedKerb.dyn can be downloaded.
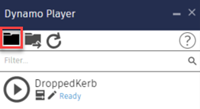
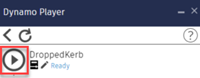
The script can be run from Dynamo directly or using Dynamo Player. The latter is especially useful for users that are not familiar with Dynamo. The process is as follows:

After running the script with the inputs above in a sample drawing, a new region is added to the corridor around the specified chainage, containing the dropped kerb. The frequency in that region is set to the baseline length to avoid undesirable stations being automatically added in the transitions. This frequency should not be changed. Some additional stations are also added. “Dropped Kerb Start” and “Dropped Kerb End” should not be deleted and no new stations should be added to this region in the transitions, that is before “Dropped Kerb Start” or after “Dropped Kerb End”. Doing so would affect the geometry of the transition.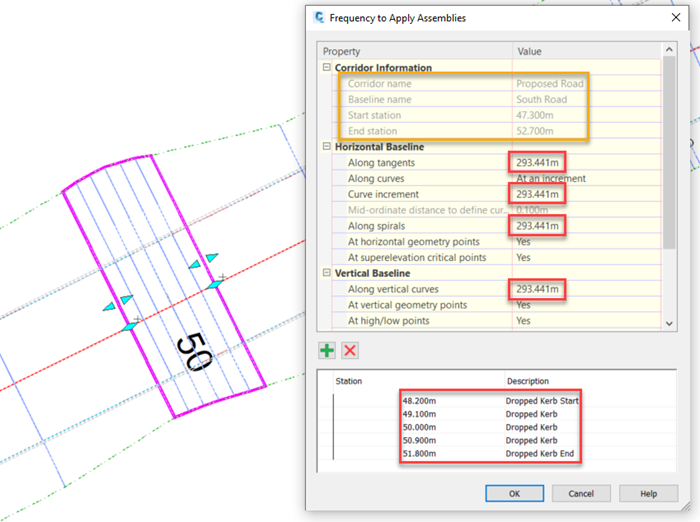
This is how the dropped kerb will show in object viewer: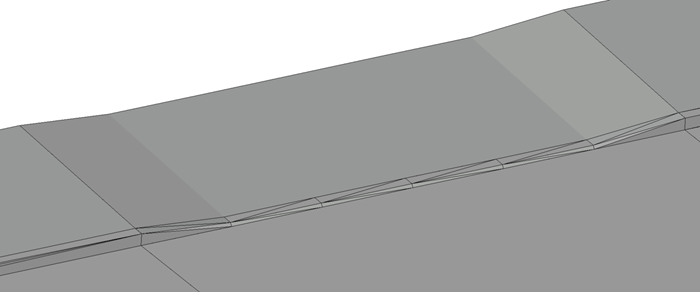
If you are new to Dynamo for Civil 3D and you would like to get a basic understanding of it, you may want to look at our “Dynamo Fundamentals for Autodesk Civil 3D” private training course, available both as virtual or face-to-face training.
Alternatively, If you would like help with Dynamo scripts, application automation, content creation, project support and much more, visit our website to explore our consultancy services.
Consultant Jason Kelly explores the new 2027 features in Autodesk Inventor Professional. Including updates to the content center and Autodesk Assistant
Vault 2027 release includes improved property handling, stronger PLM connectivity, and the introduction of the AI‑powered assistant.
AutoCAD 2027 introduces new tools to improve collaboration, drawing accuracy, and productivity, including Autodesk Forma data management integration, Geometry Cleanup, and the AI‑powered Autodesk Assistant. In this guide, we highlight the key AutoCAD 2027 updates and explain how they support more efficient, connected workflows for design teams.