A topic we come across frequently is how to achieve good renders with Inventor data, as Inventor studio does not achieve the quality we ultimately desire.
The removal of Autodesk Showcase from the creative suites a number of years ago, has led a lot of people to ask if 3ds Max is an option? But, normally people start 3ds Max, have a look and close it down pretty sharpish. However, over the years Autodesk has put a lot of work into making 3ds Max more accessible for new users and brought Inventor and 3ds Max closer together, developing some useful workflows and data transfer between these applications.
So, this article is designed to highlight two things, firstly a few ease of use and configuration options in 3ds Max to be aware of as an Inventor user. Secondly to explain what data can be transferred between Inventor and 3ds Max, along with some considerations in this regard.
3ds Max - Ease of Use and Configuration
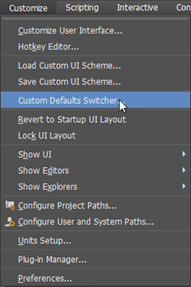
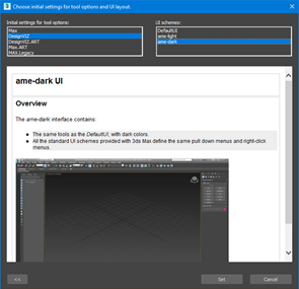
Older versions of 3ds Max prompted users, on the first startup to select their industry sector to preset several key elements. In newer versions, you are no longer prompted on startup, instead, you can change these settings in the Custom Defaults Switcher, on the Customize menu. DesignVIZ is a good option for Product Design and Manufacturing Collection users, with additional options for light or dark themes.
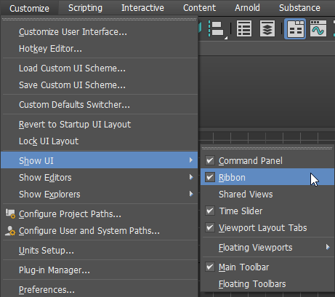
Following this change, another useful option, especially those used to Ribbon interfaces in Inventor and AutoCAD, is to enable the 3ds Max Ribbon. This option is located under Show UI on the Customize menu.
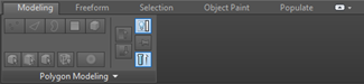
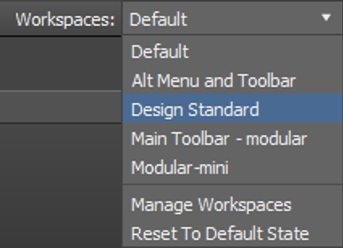
Once Ribbon is enabled, you can switch the workspace from Default to Design Standard. Now the interface is a little easier to work with, the next hurdle is navigation.

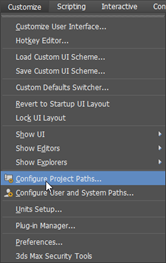
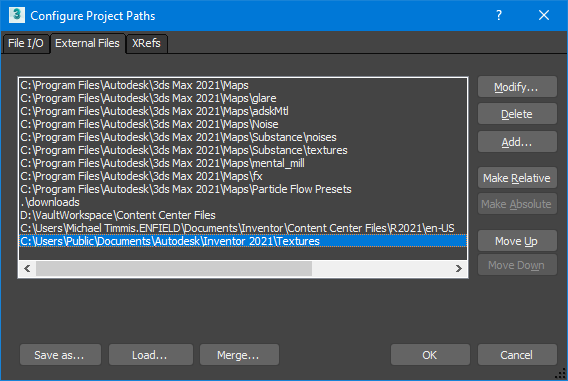
When importing models from Inventor, it might include components from Content Center, which you may find are missing by default. The simplest way to deal with this is to add an External Files, Project Path pointing at your Inventor Content Center location. To do this Configure Project Paths, found on the Customize menu.

In the same way, you can also add an External Files, Project Path pointing at your Inventor Textures folder. This will ensure that any standard or non-standard appearances you have added, come across with the relevant texture information.
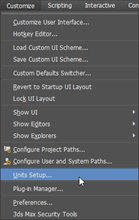
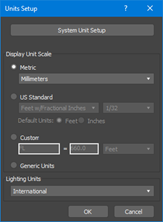
Lastly, it is worth checking that your 3ds Max Units Setup matches your Inventor data. This can be very important when importing and merging different model datasets.

Inventor and 3ds Max – Data Exchange and Settings
There are several Autodesk direct Importers installed alongside the main 3ds Max application out of the box. Specifically, Inventor Interoperability, allowing for native import of Inventor datasets, however many other file types are accepted within 3ds Max.
Before going straight to import within 3ds Max, it is worth considering a few things about the data you might be bringing in from Inventor.
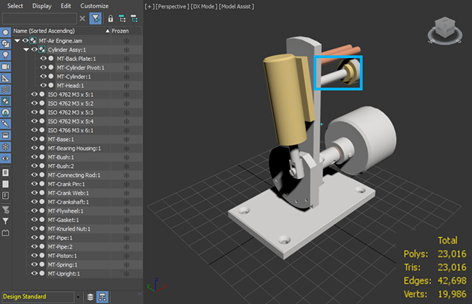
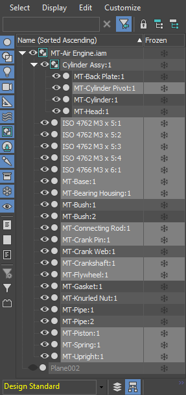
- 3ds Max imports component names from the Inventor Browser, not File Name or Part Number
- 3ds Max ONLY imports geometry within the active LOD, so it can be worth setting up a “Visualisation” Level of Detail (LOD) within Inventor. This will ensure only critical data is transferred, saving time and scene size.
- Basic material library definitions are imported, if the texture path is found, the material transfer is supported
- Inventor Decals are NOT supported, but Appearance Textures are, so this can be an alternative option
Now you are ready to import, but which option to pick? Import brings in a single dataset and sets the scene defaults, whereas Merge brings additional datasets into the existing scene.
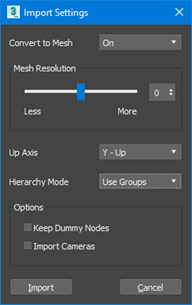
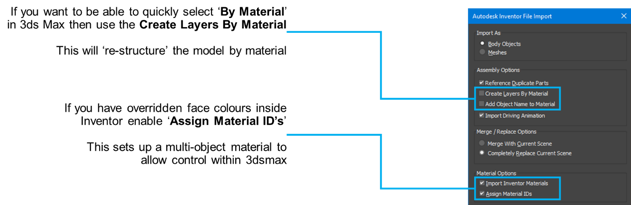
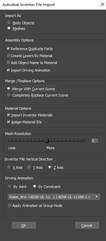
When it comes to Import, to bring a single Inventor dataset across, you will be presented by the Autodesk Inventor File Import dialogue, which contains a few settings to be aware of.

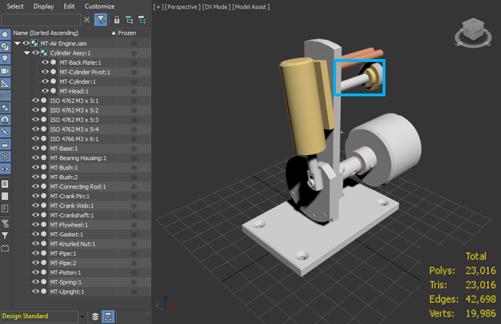
Mesh Import:
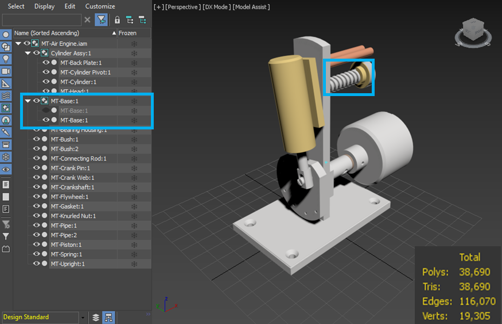
Body Objects Import (notice the spring is missing!):
For larger models and/or performance and speed, it can be useful to STEP out the Inventor model first, then Import this into 3ds Max.
The Autodesk Inventor File Import dialogue also contains a few settings relevant to how Materials are handled as below.
Once a new scene is created, it is likely that multiple Inventor components using the same Inventor material may end up generating multiple versions of the same material definition within 3ds Max.
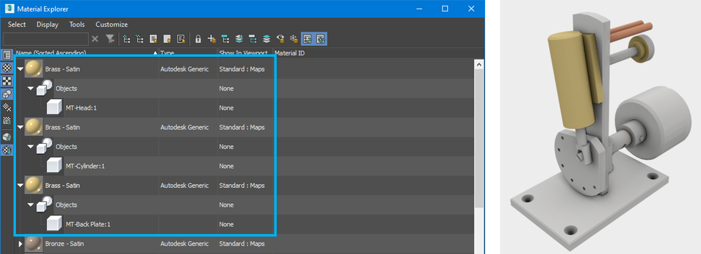
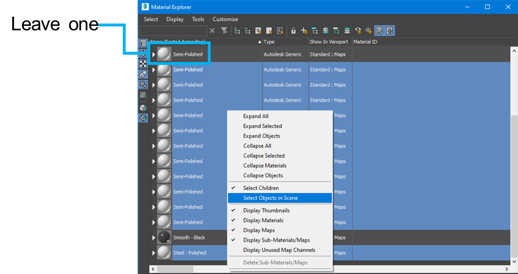
To simplify the setup and any future material changes, it is worth considering merging all the same materials definitions together. The Material Explorer can be used to select all duplicate materials. The model will be Grouped as per the Inventor design. Make sure you select the Open Recursively option on the Group menu to make selection easier.
It is possible to quickly convert from Autodesk Materials to Physical Materials inside 3ds Max, which will supply a much higher quality output and work better with the Arnold renderer inside 3ds Max. To do this, go to Scene Converter, found on the Rendering Menu. Use the ART preset to convert the imported Materials.
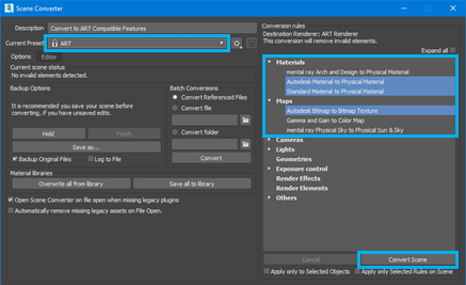
The image below shows the before and after results for our sample dataset from Inventor, running through the Scene Converter.

During the Import of Inventor data, it is possible to bring ONE driven constraint (Do not mix Constraints and Joints). This may seem limited if you have a more complex animation in your model or multiple moving components. However, you can Merge multiple Inventor Assemblies, each with its own driven constraint together and ‘time lined’ accordingly.
Obviously, there will be other areas of 3ds Max to learn, in order to enable you to begin utilising the rendering power which can be delivered. But as stated at the start, this article was aimed at communicating some of the ways in which Inventor and 3ds Max are coming closer together. Enabling greater and easier transfer of data within the Product Design and Manufacturing Collection.
Synetri offers a number of 3ds Max training courses, so if you wish to learn more about getting the best from this very capable application, do get in touch to explore the right options for you and your organisation.
